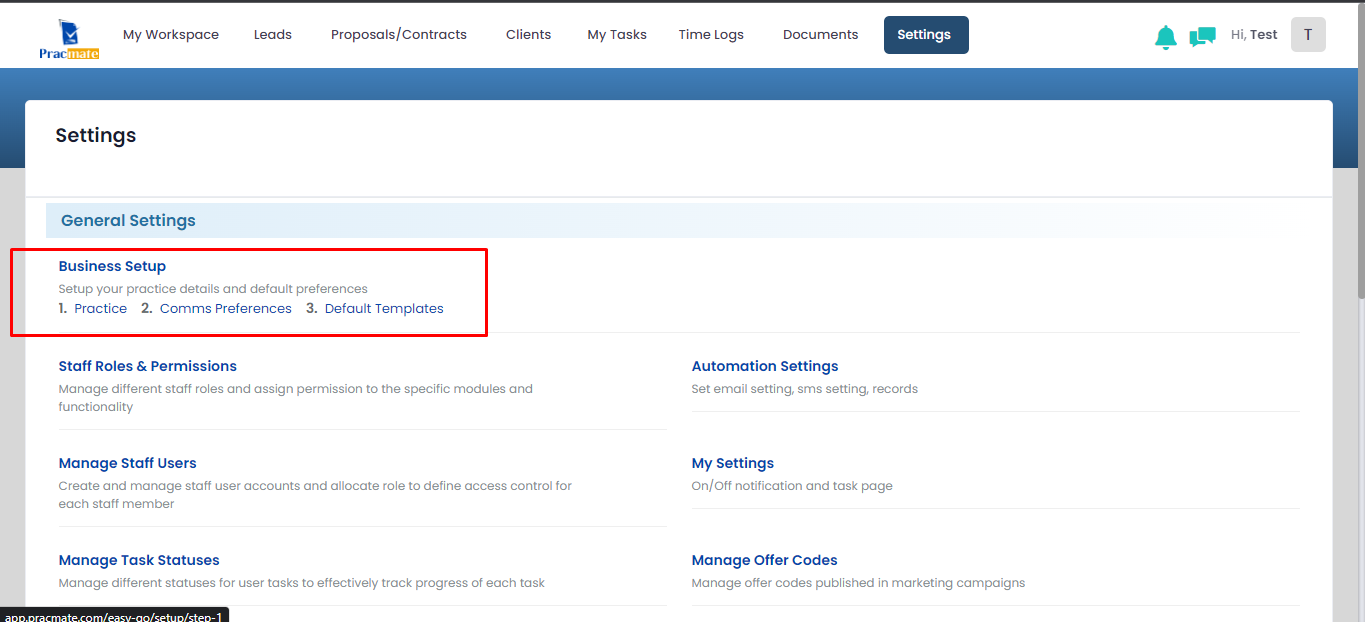
You can manage already added business setup by selecting particular steps from general settings – Business setup section. You will navigate to particular selected step. It will not show Plan selection here. You can change plan from my subscription page.
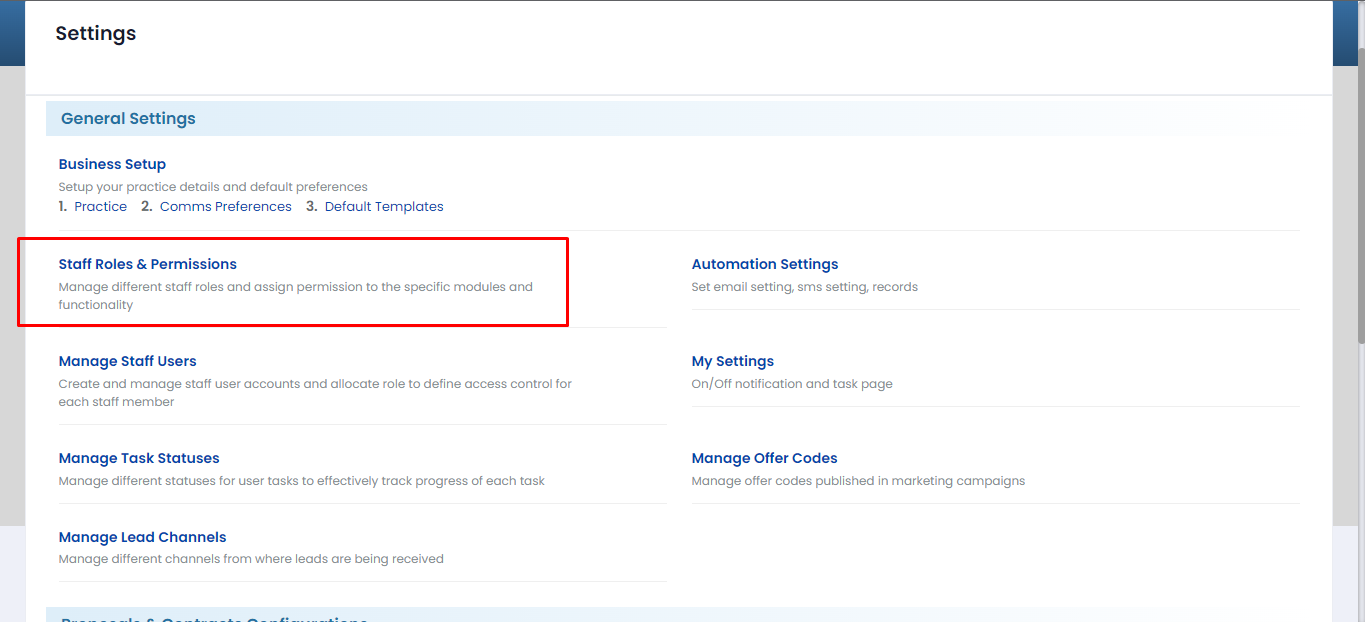
You can manage different staff roles and assign permission to the specific modules and functionality from staff roles & permissions module. By selecting link from here, you will navigate to staff roles & permissions listings page.
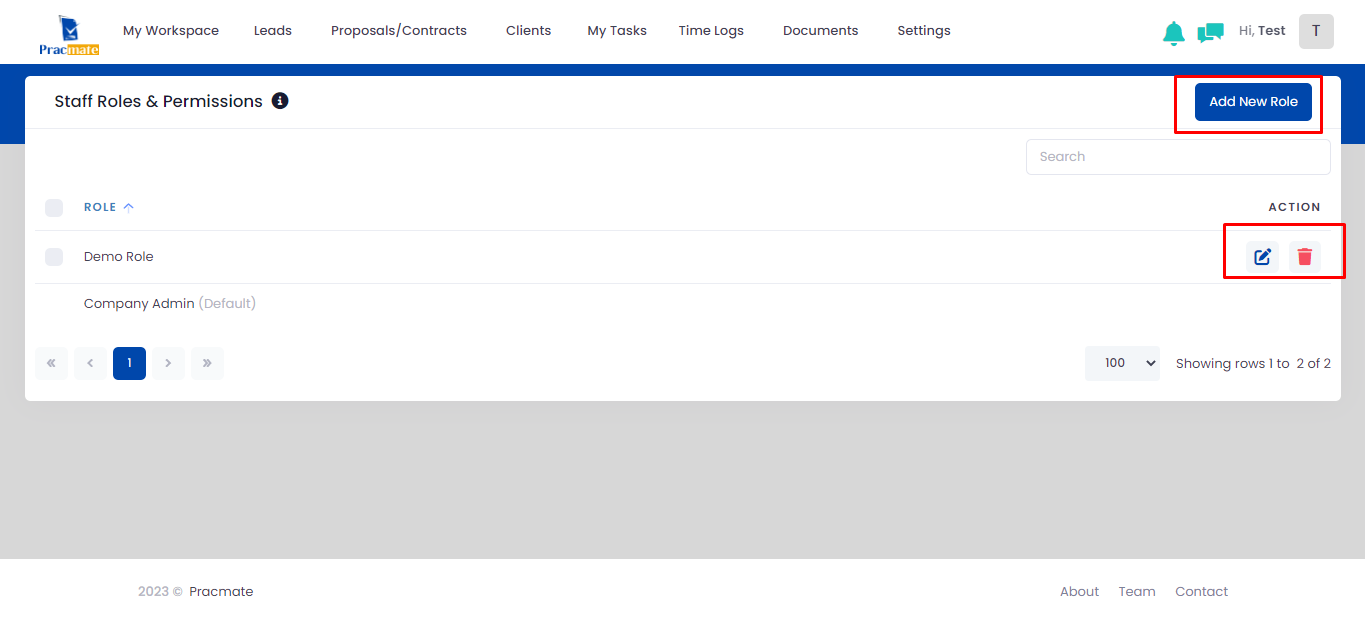
By default, you can see “Company Admin” role. You can create new role by selecting “Add New Role” button. It will open popup to create new role. You can edit/delete role by selecting particular option from action column.
In Add new role popup, by selecting particular line, it will expand/collapse permission related details.
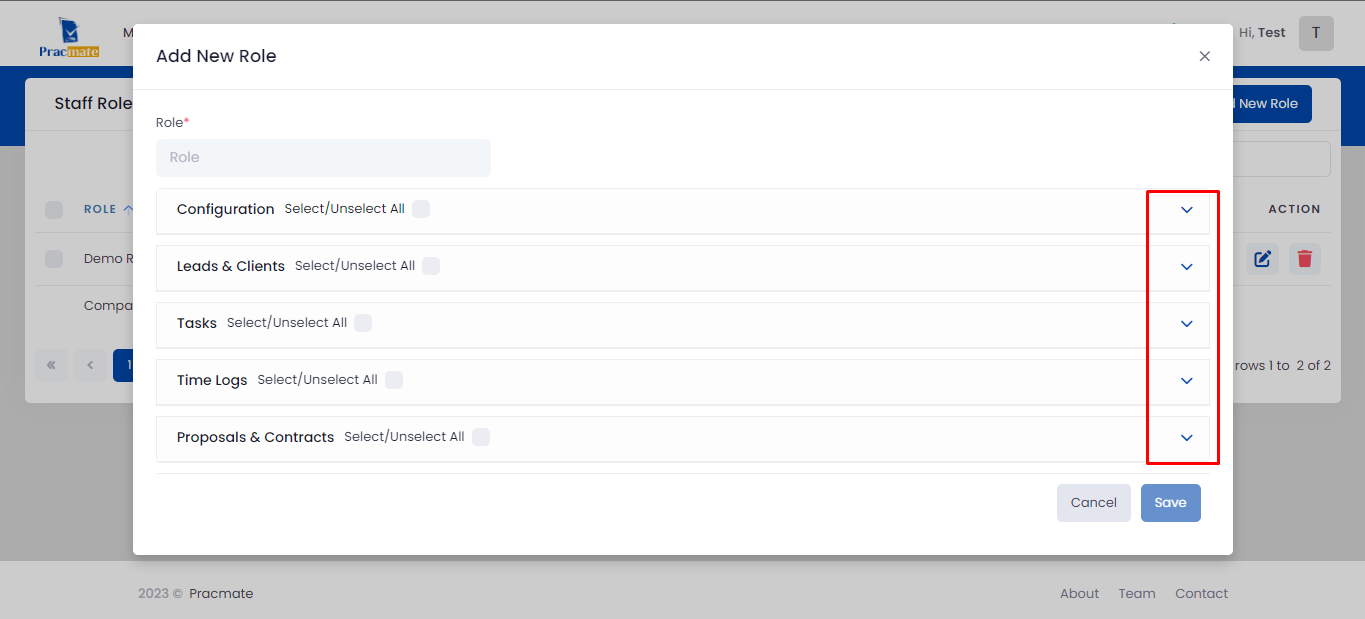
You can give permission by selecting checkboxes showing besides particular label.
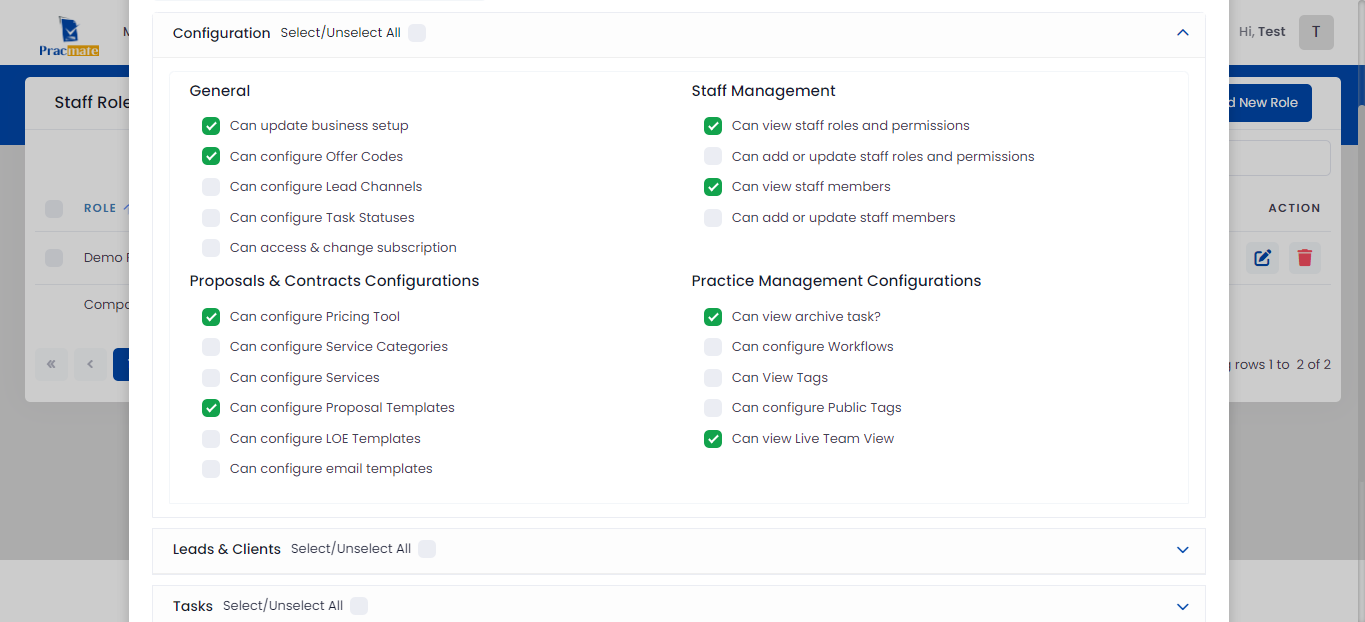
You can create & manage staff user accounts and allocate role to define access control for each staff member. By selecting link from here, you will navigate to manage staff users’ listings page.
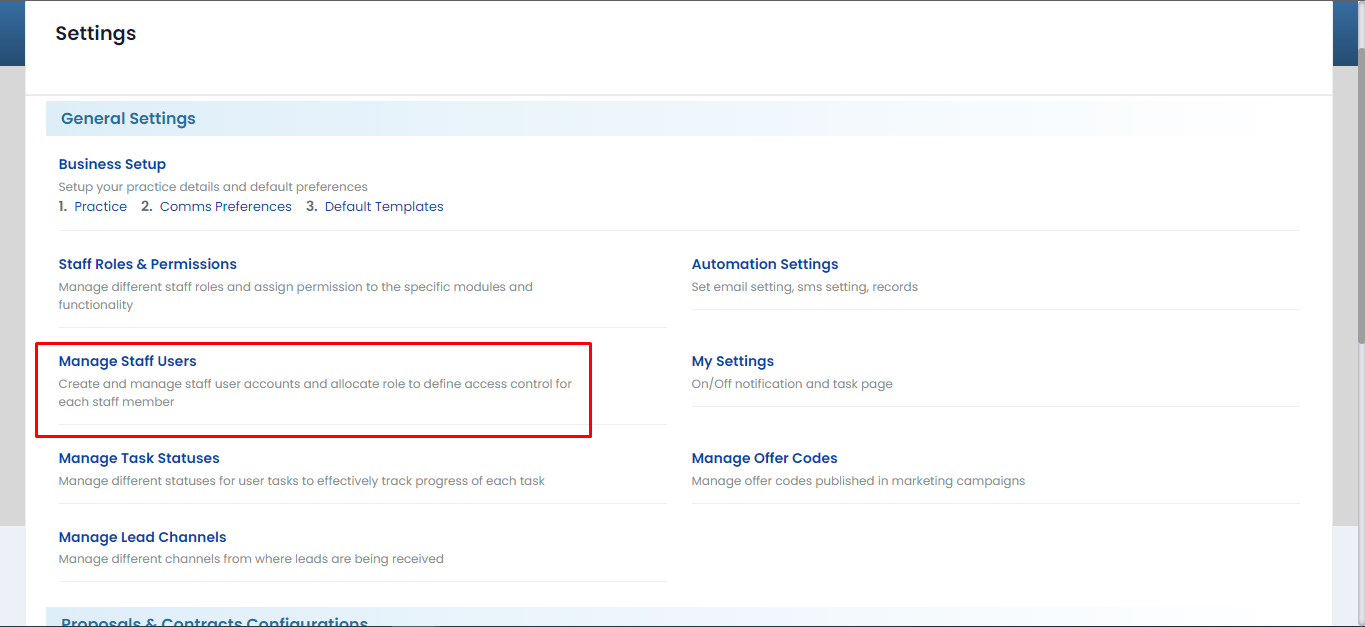
You can create staff by selecting “Add Staff” button selection. You can edit/delete staff from relevant icon selection showing in action column.
You can create staff member by entering below mentioned details in add staff page.
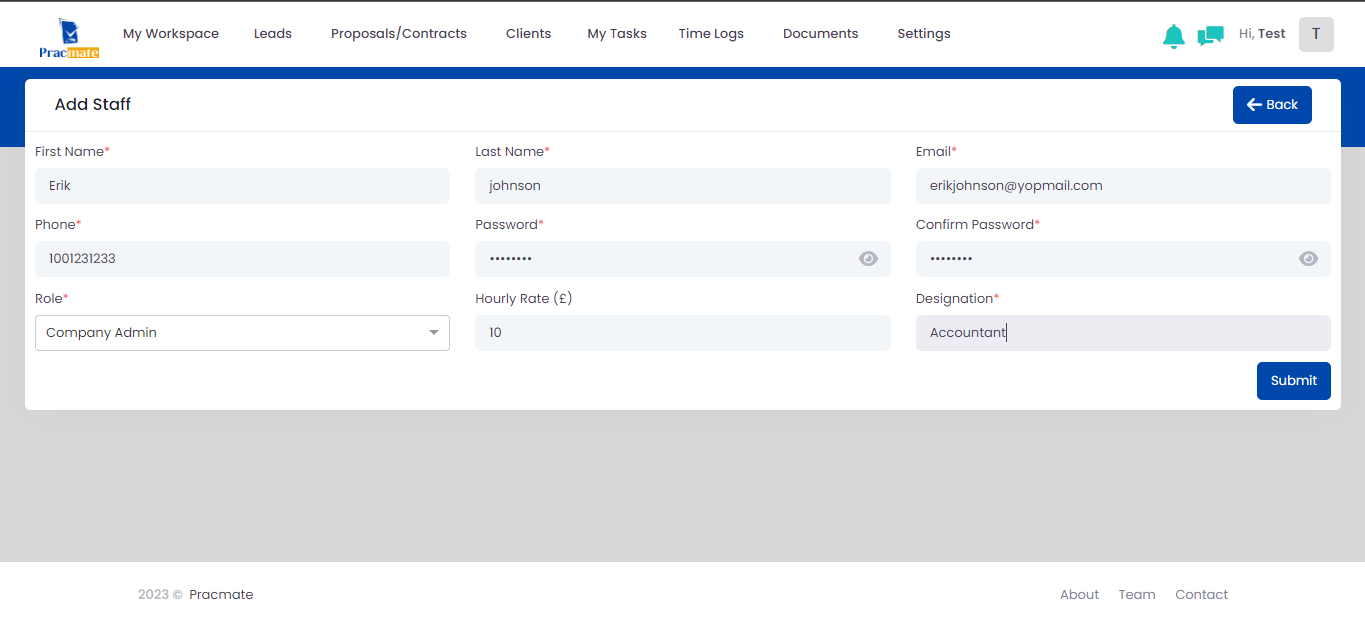
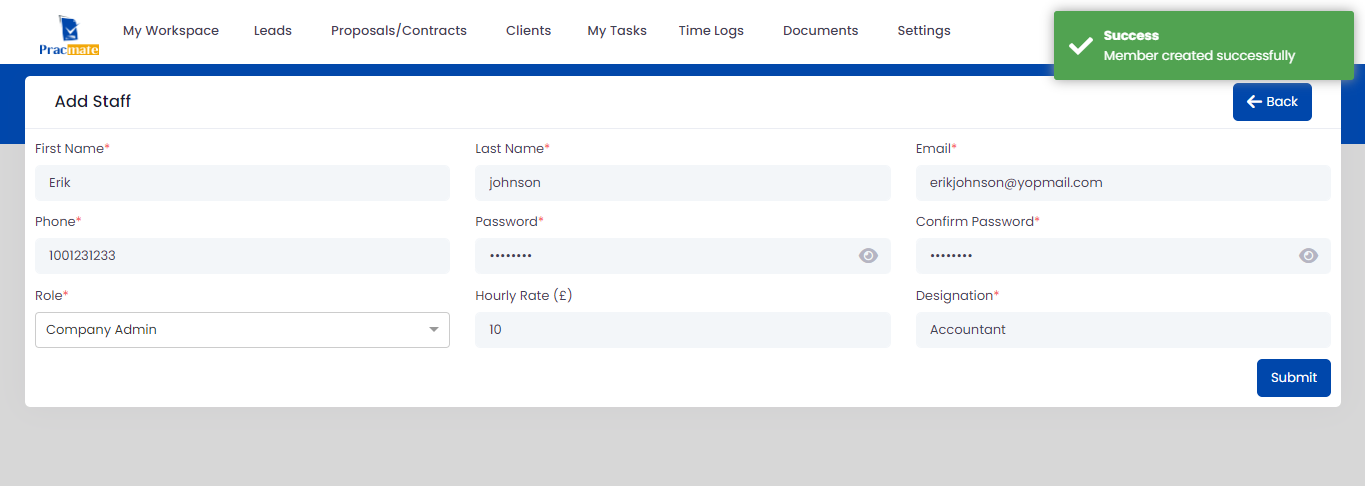
After successfully created staff member, it will show success toast. Furthermore, staff member will get email from pracmate to “Reset Password” & staff can reset his password from there.
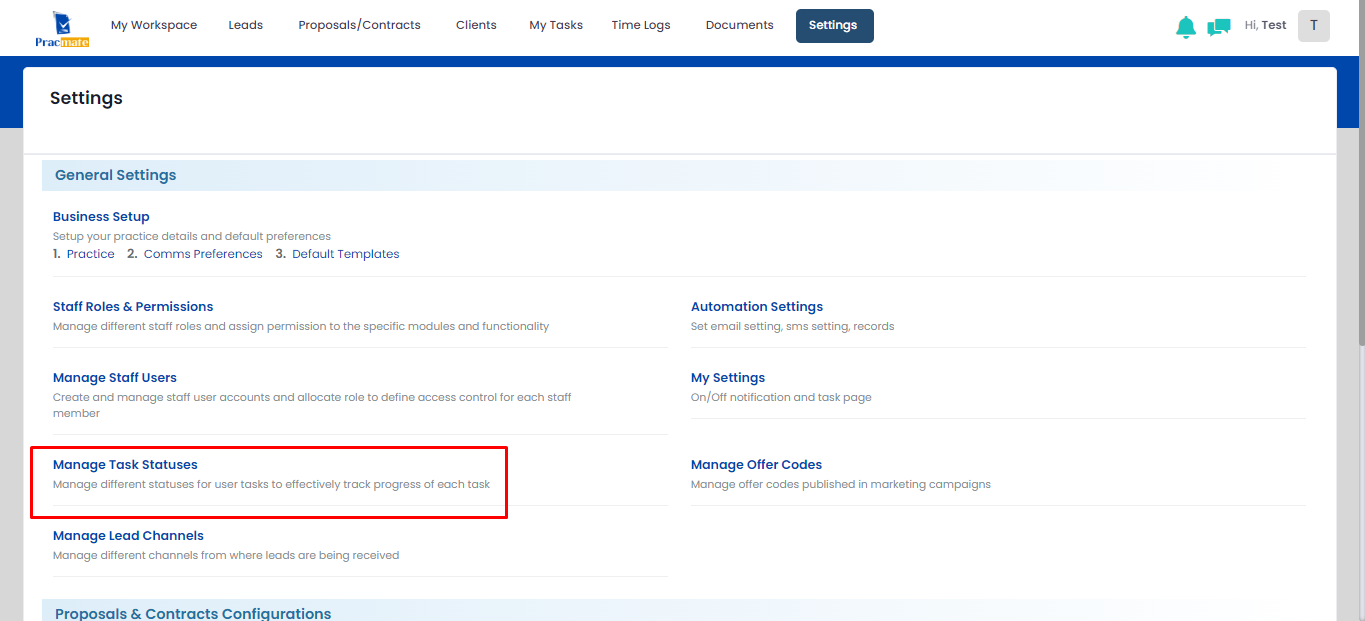
You can manage different statuses for user tasks to effectively track progress of each task. By selecting link from here, you will navigate to manage task statuses listings page.
For your convenience we have created default statuses. you can Edit/Delete default statuses as per your requirements furthermore, you can create new status from “Add New Status” button selection.

By selecting “Add New Status” button, it will open “Add Task Status” popup. You can add new status with adding particular status name. after creating new, you can see that status in listings page.

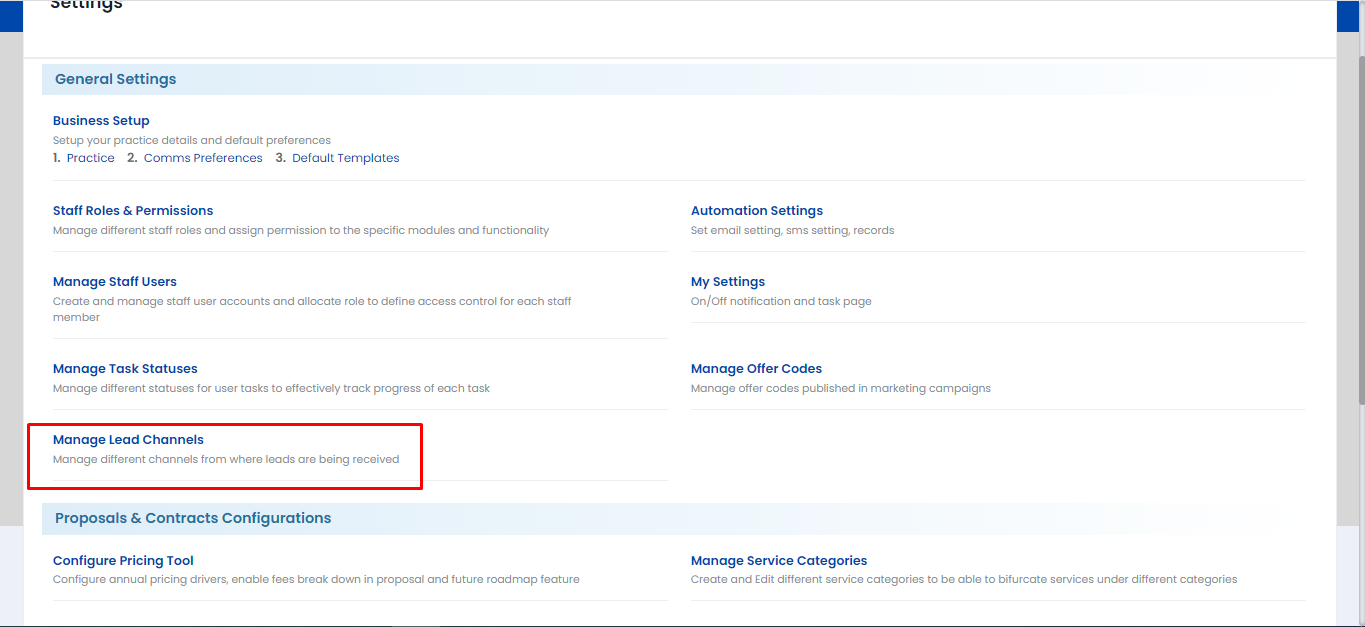
You can manage different channels from where leads are being received. By selecting link from here, you will navigate to manage lead channels listings page.
For your convenience we have created default lead channels. you can Edit/Delete default lead channels as per your requirements furthermore, you can create new lead channel from “Add New Lead Channel” button selection. Also you can Active/Inactive lead channels by doing Toggle ON/OFF. Lead channels will work according to toggle button selection.
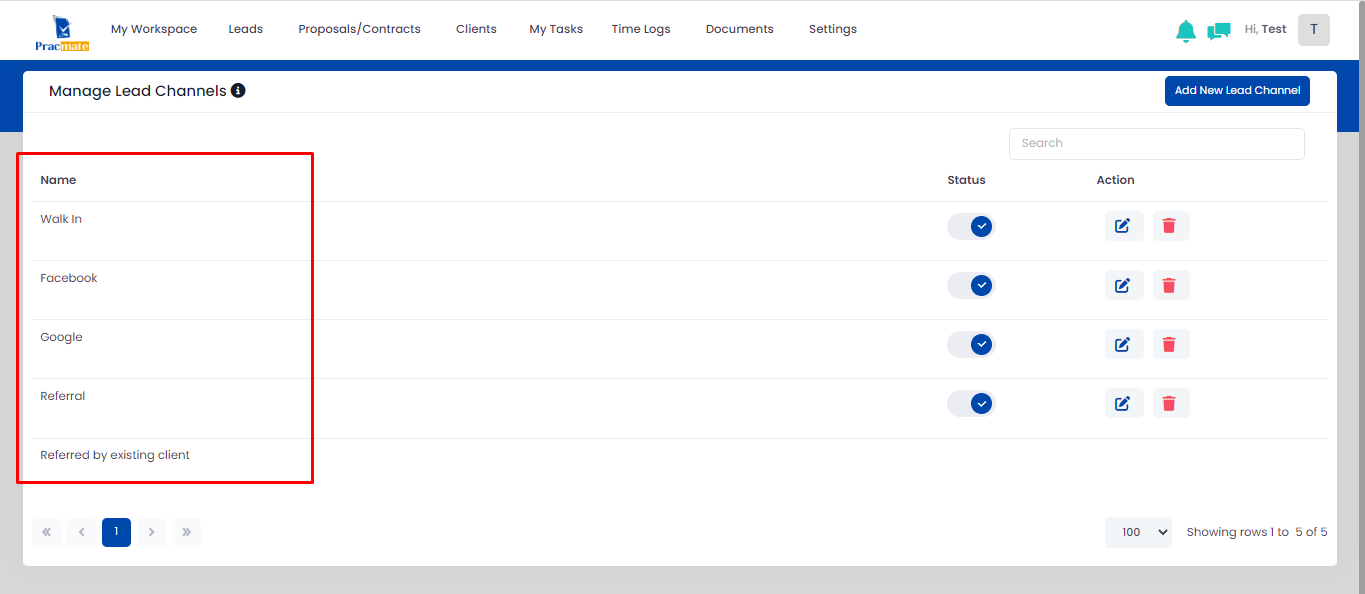
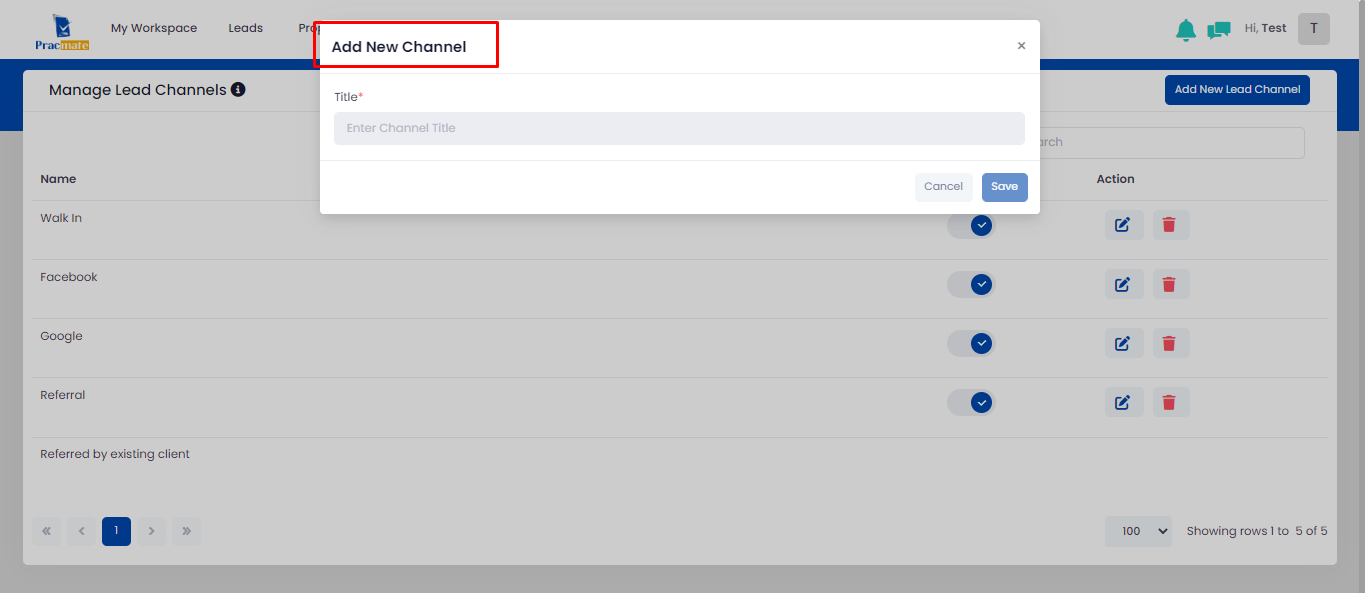
You can add new lead channel by entering particular title in “Title” field. After creating new channel, you can see that created channel name in listings page.
You can manage different offer codes from here. By selecting link from here, you will navigate to manage offer codes listings page.

On listings page, you can Add, Edit, Delete or Active/Inactive offer codes. You can see all created records on listings page. When you inactive any offer code it will not show on Leads > Internal Ref > Offer Code field. Same working for date range of offer code. When validity expired for particular offer code, that offer code will not show on Leads > Internal Ref > Offer Code field.
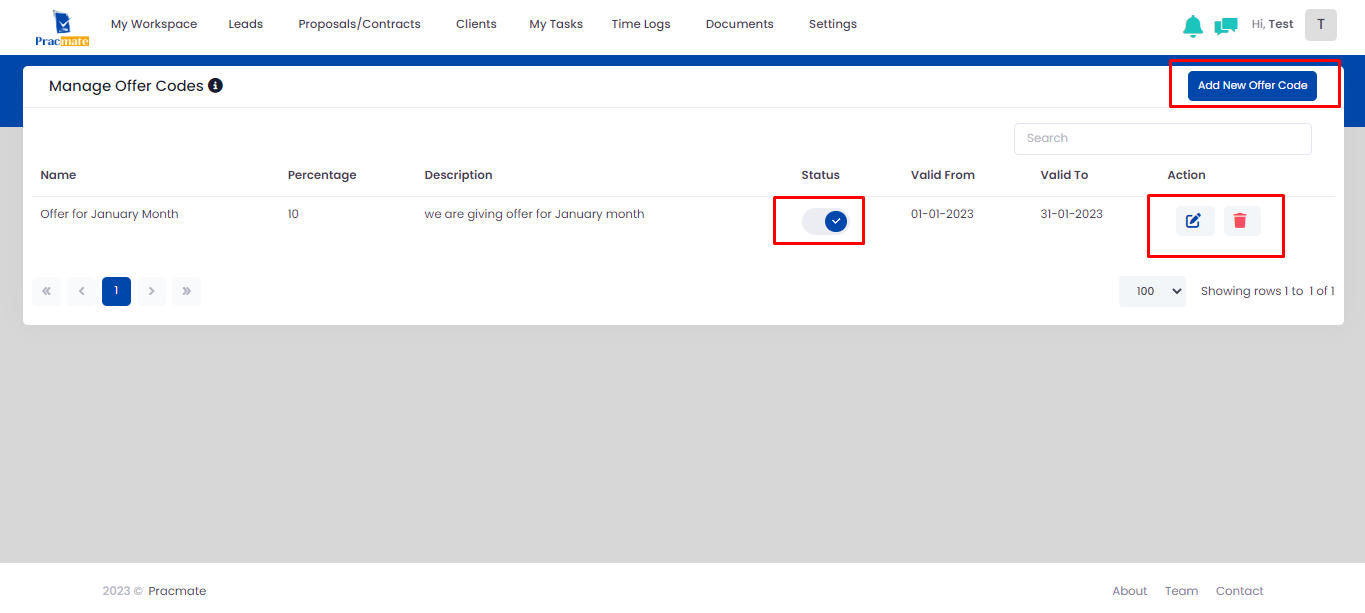
On “Add New Offer Code” button selection, it will open “New Offer Code” popup. You need to add all mandatory fields to create offer code. For creating offer code, you need to follow below steps:
After adding all details, on “Save” button selection, New offer code will get create & you can see that offer code on listings page.

You can manage all your automation settings from Automation Settings page. By selecting link from here, you will navigate to Automation Settings page.
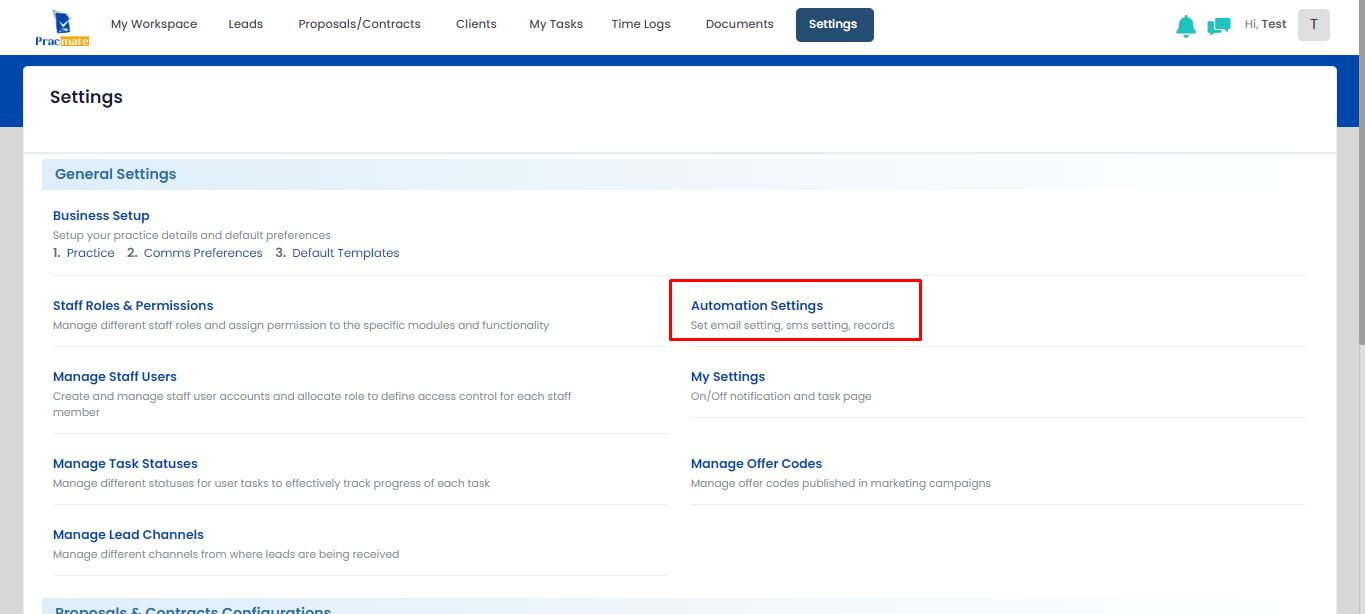
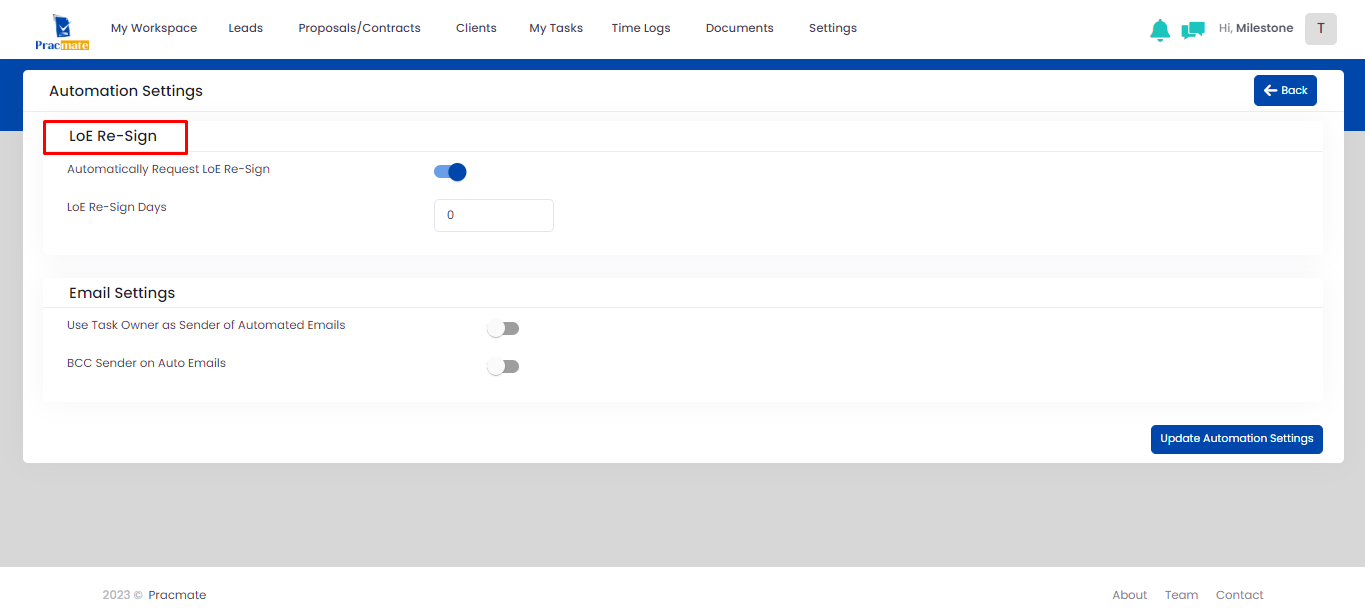
On Automation settings page automation settings for “LOE Re-sign” & “Email Settings”.
LoE Re-Sign: you can manage LOE re-sign email day wise. By default, it will send email for re-signature on daily basis. You can manage days by entering preferred days’ count in “LoE Re-Sign Days” field. When you do toggle inactive, it will stop sending emails for Re-Sign.
Email Settings: You can manage task related automation settings from here.
If “Use Task Owner as Sender of Automated Emails” toggle is active, it will show task owner name as sender in all task related automated emails.
If “BCC Sender on Auto Emails” toggle is active, It will set task owner in BCC & task owner will also get that email.
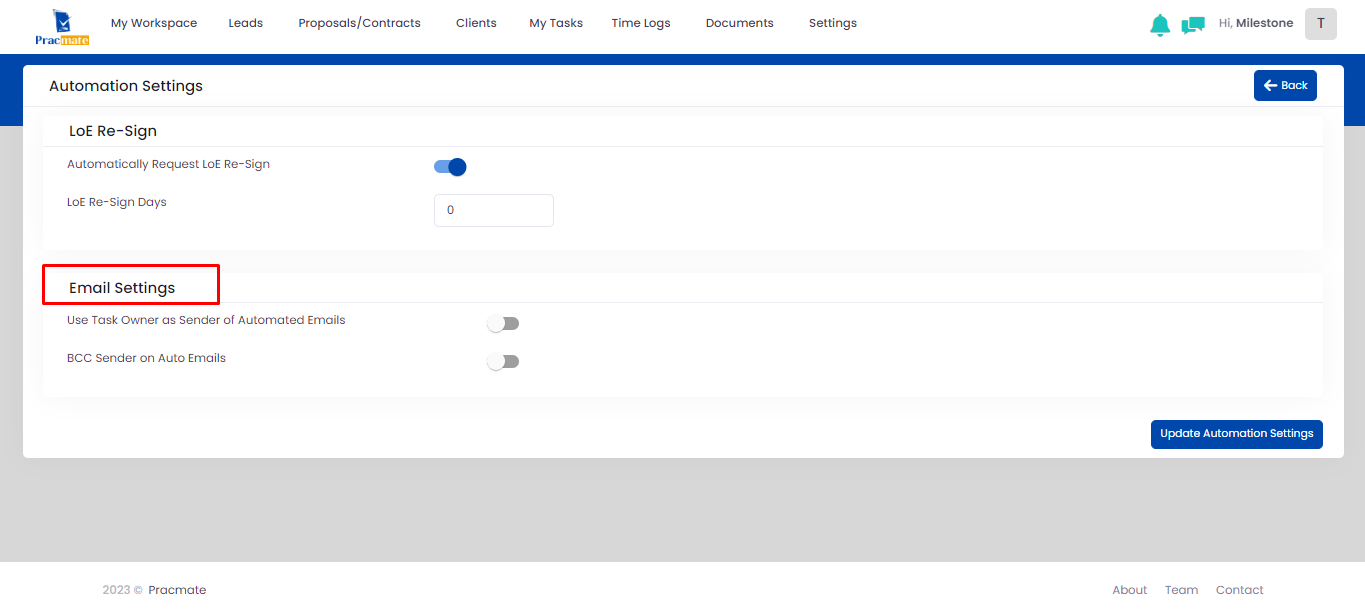
All changes will be saved after selecting “Update Automation Settings” button.
You can manage all task related notification settings from here. Notifications will be send based on toggle button selection. If toggle button is active then it will send notifications to respective user, if not then it will not send notifications.

Proposals & Contracts Configurations > Manage Service Categories
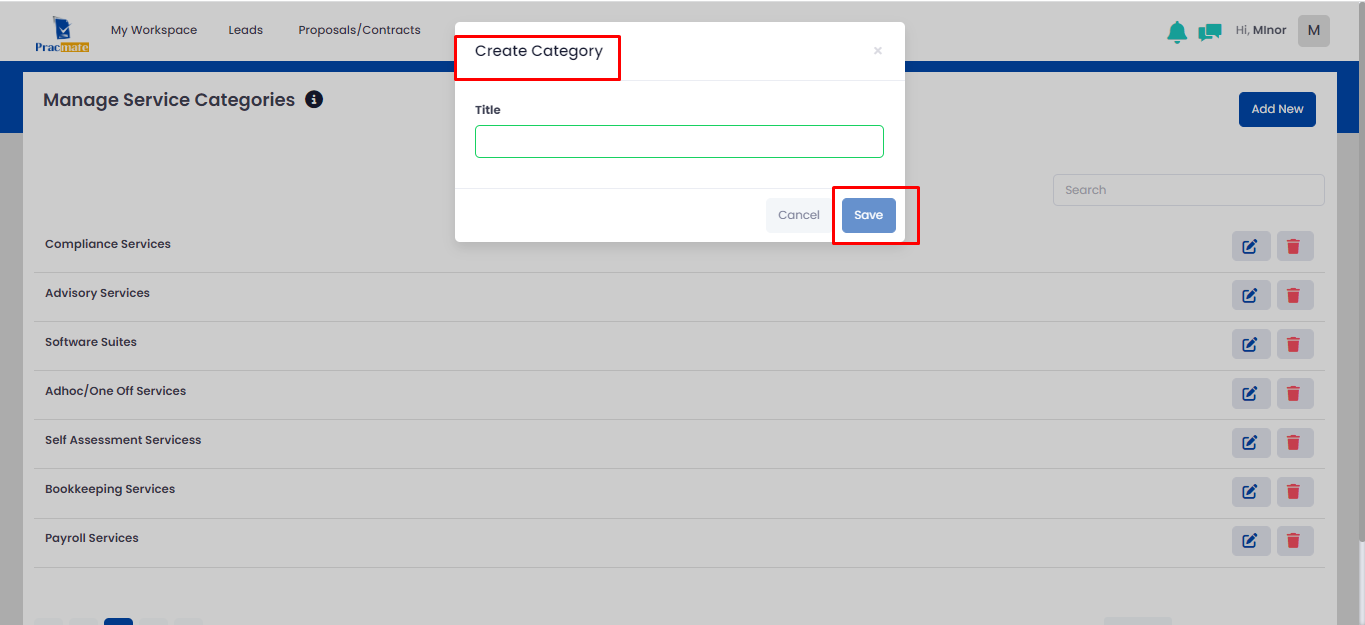
You can manage different service categories to be able to bifurcate services under different categories. By selecting link from here, you will navigate to manage service categories listings page.
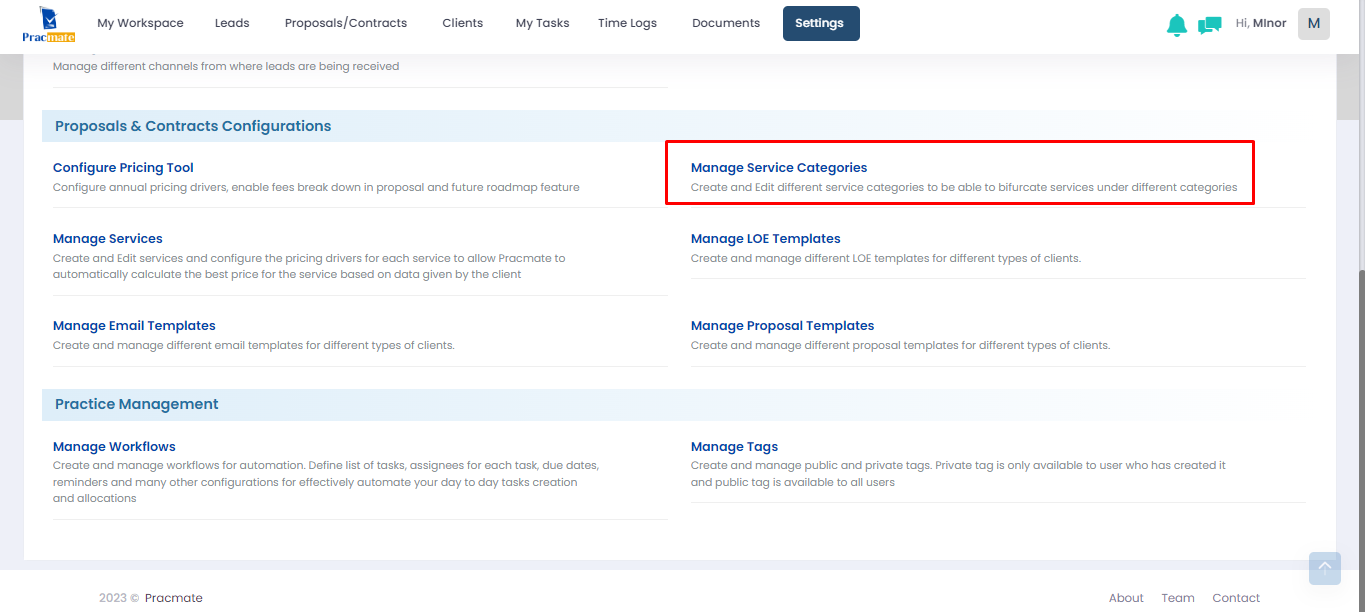
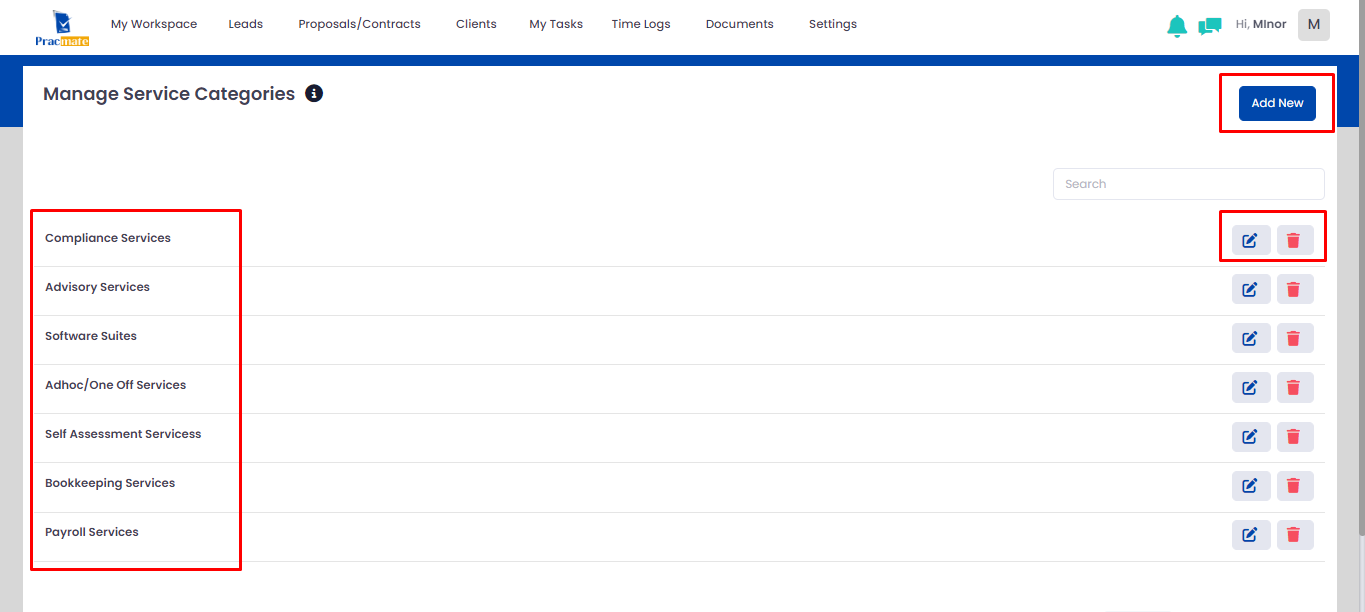
For your convenience, we have added some of default categories. You can edit/delete particular services from action column. Furthermore, you can add new service from “Add New” button selection.
On “Add New” button selection, it will open “Create Category” popup. You can enter particular category name in “Title” field & select “Save” button. New created category will show in listings page.
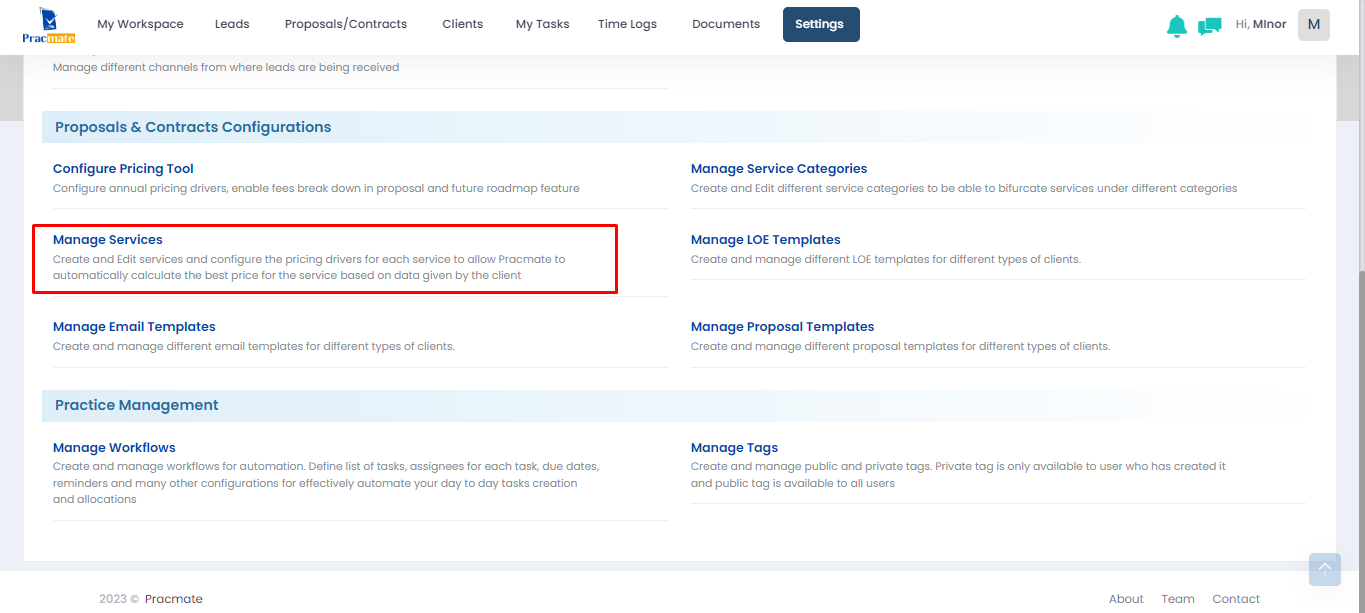
You can manage services & configure the pricing drivers for each service to allow pracmate to automatically calculate the best price for the service based on data given by the client. By clicking on link from here, you will navigate to manage services listings page.
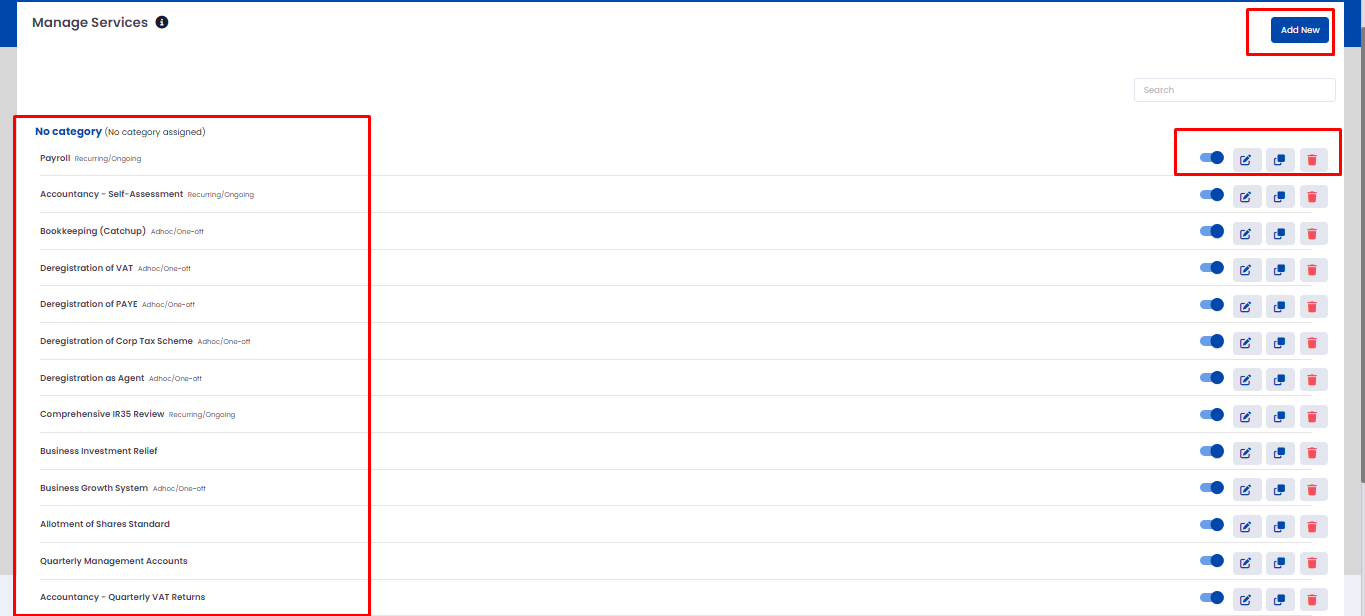
For your convenience, we have added some of services by default, so you can easily use that services but you can edit/delete or active/inactive from action column. You can add particular service from “Add New” button selection. We have added some more features here to make some actions easy. You can copy particular services from “Copy” icon selection shown in action column. On copy icon selection, it will create duplicate record. So you can create another service with changing some of your required contents. If particular service is inactive, it will not show that service in relevant modules. Like, Proposals/contracts module.
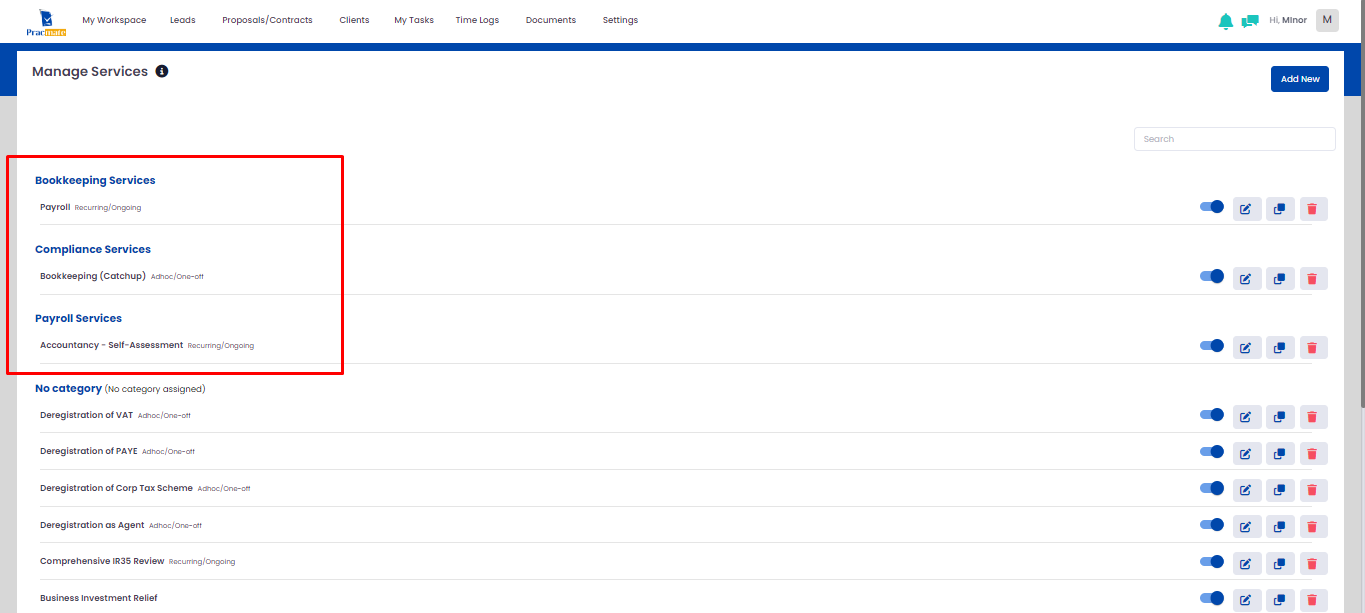
By default, all services will show under “No Category” header, but when you assign particular category to particular services, it will show that services under that selected category.
On “Add New” button selection from listings page, it will show “Add Service” page. From here you can create new service.
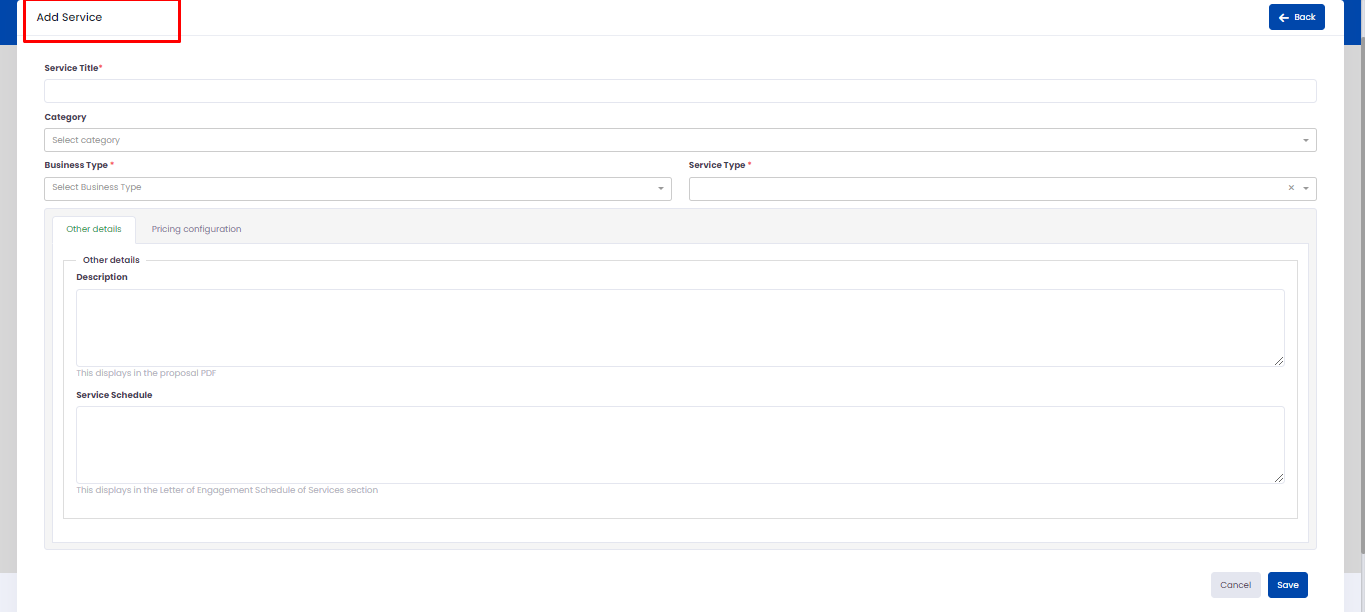
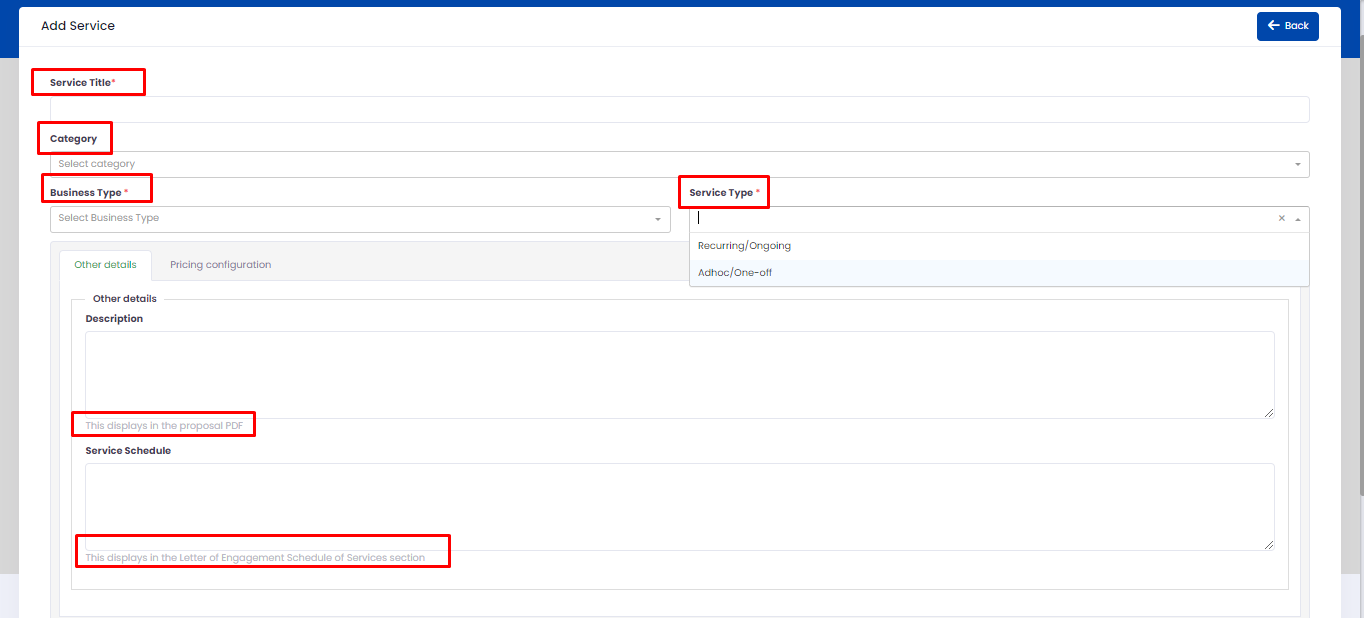
In Add Service page, you can add particular title in “Service Title” field. In “Category” field, you can select particular service category. In “Business Type” field, you can select particular type of business. In “Service Type” field, you can select either “Recurring/Ongoing” or “Adhoc/One-off” type of service. On “Recurring/Ongoing” service type selection, service will show in recurring services tab in proposals/contracts module & on “Adhoc/One-off” type selection, it will show in “Adhoc services tab.
In “Other details” tab, you can add “Description” & “Service Schedule”. Entered description will show in proposal PDF & entered “Service Schedule” will show in Letter of Engagement Schedule of Services section.
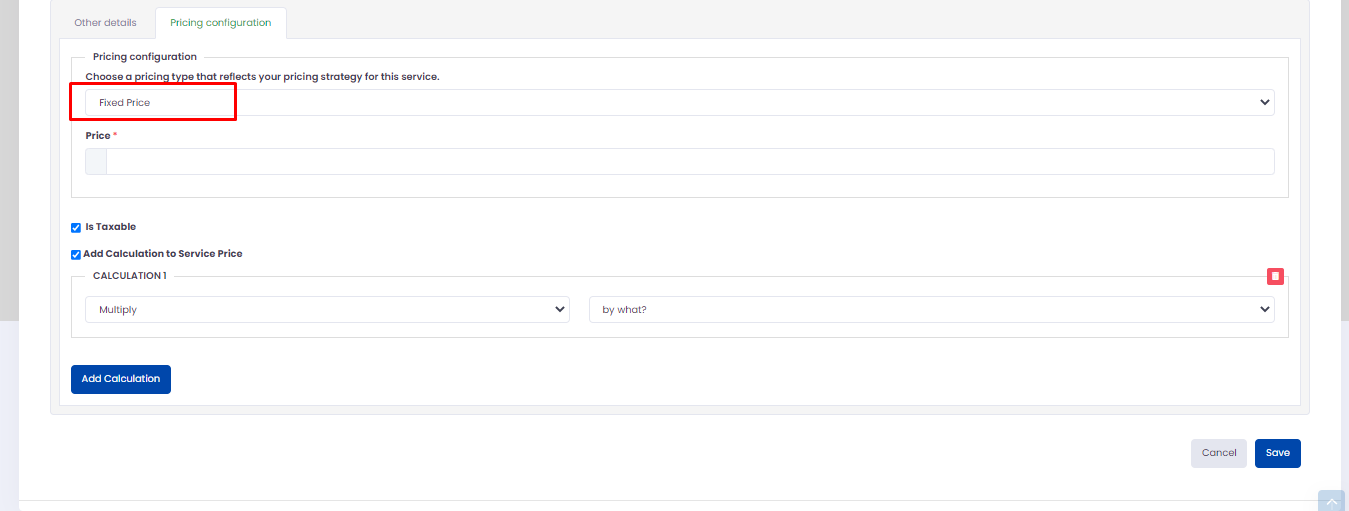
In “Pricing configuration” tab, you can see different fields like, “Choose a pricing type that reflects your pricing strategy for this service.”, “Price”, “Is Taxable”, “Add Calculation to Service Price”.
On “Is Taxable” checkbox selection, it will count this service as taxable in proposals/contracts flow which you have added in business setup > Practice tab > Other Details section.
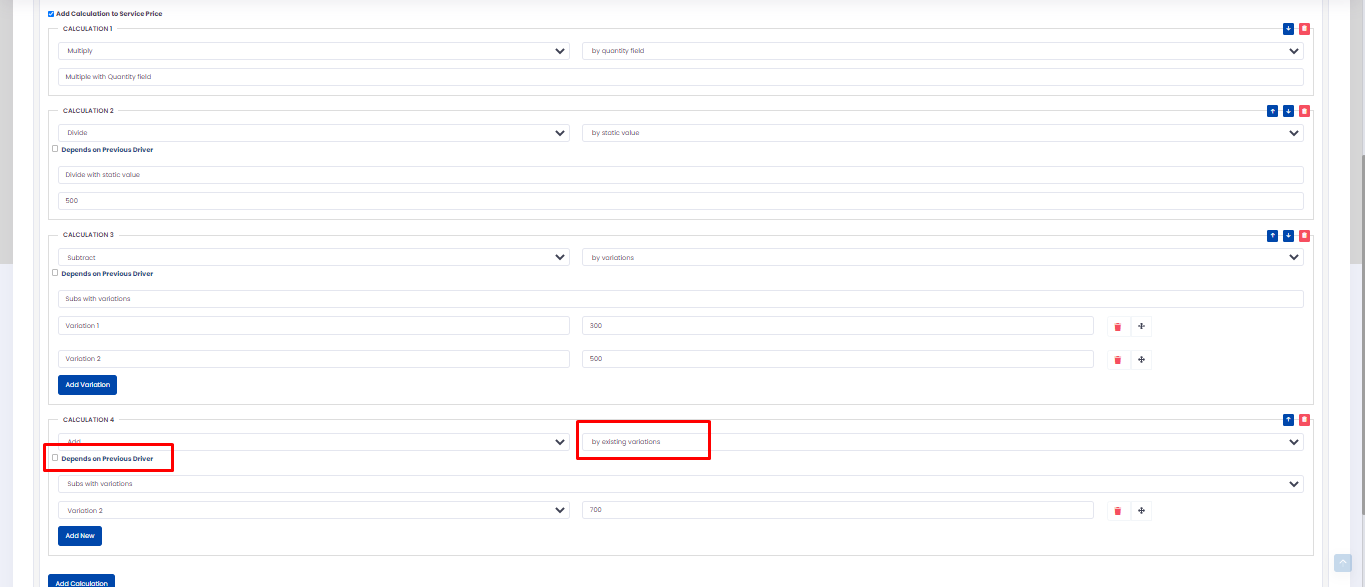
On “Add Calculation to Service Price” checkbox selection, you can see particular fields for calculations. You can add different types of calculations. All calculations will work according to added/selected data to calculate.
When you select “by existing variations” option, it will show “Depends on previous driver” checkbox in all added calculations to select. On checkbox selection, it will show that functionality in proposals/contracts module > Configure Pricing tab.
In “Choose a pricing type that reflects your pricing strategy for this service.” Dropdown, on “Fixed price” option selection, it will show other fields as shown in below screen shot. In “Price” field, you can add particular amount which you want to apply for this service.
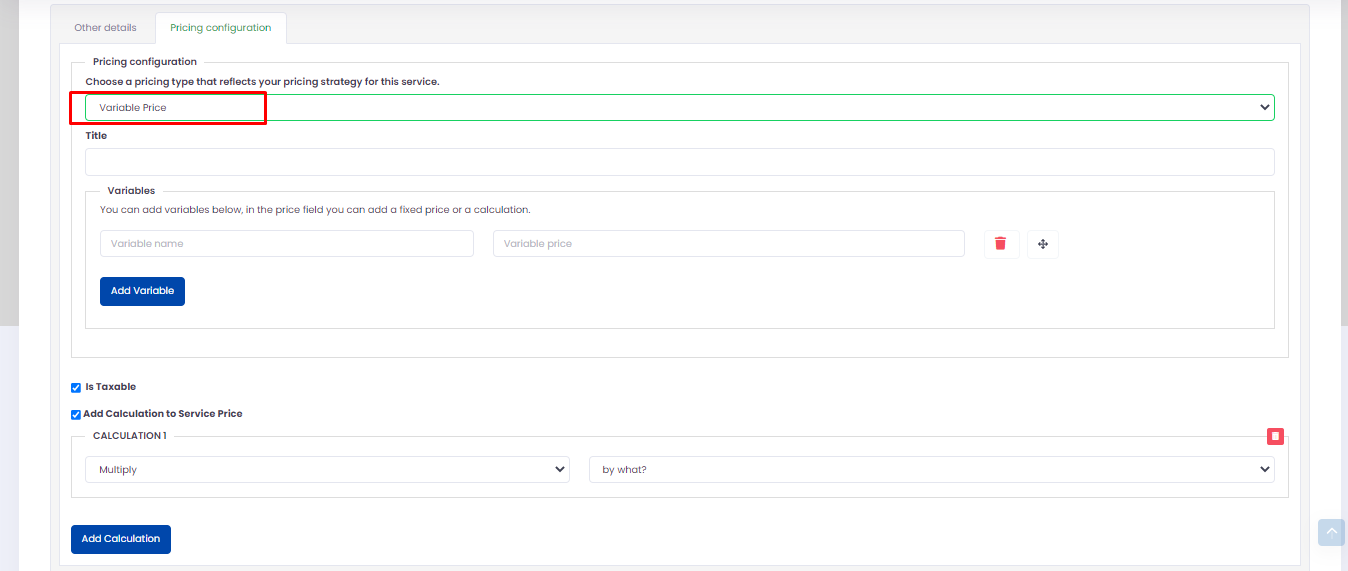
In “Choose a pricing type that reflects your pricing strategy for this service.” Dropdown, on “Variable price” option selection, it will show other fields as shown in below screen shot. You can add particular title in “Title” field. You can add multiple variables in “Variables” fields. You can add new variable by selecting “Add Variable” button. It will add new line.
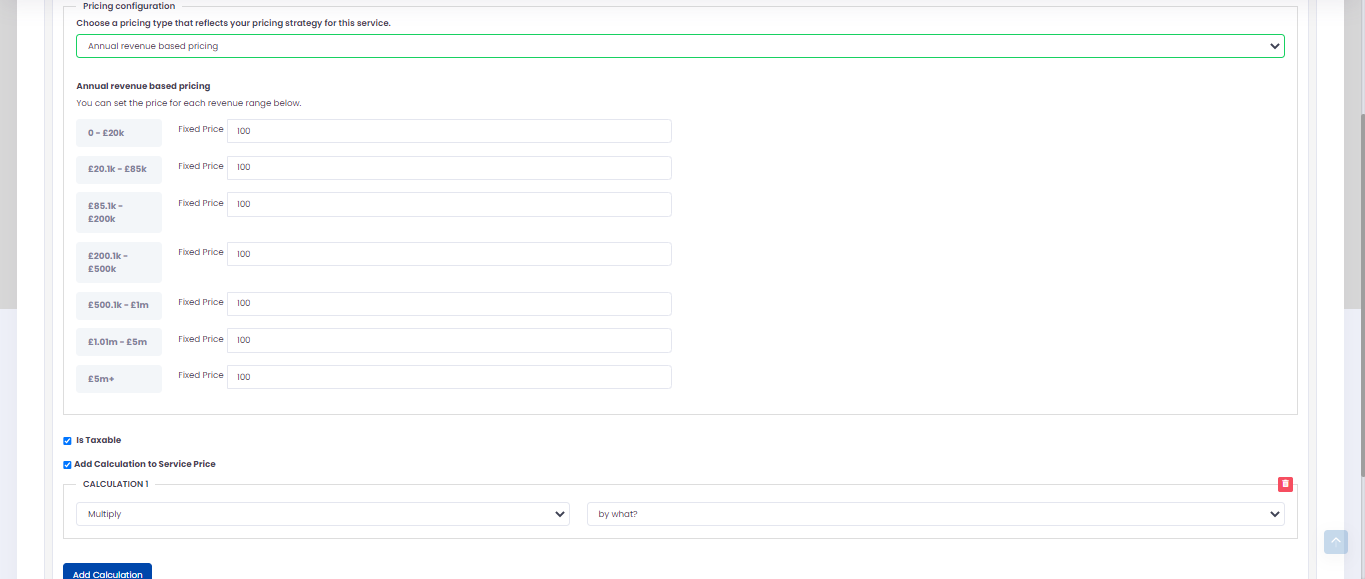
In “Choose a pricing type that reflects your pricing strategy for this service.” Dropdown, on “Annual revenue based pricing” option selection, it will show other fields as shown in below screen shot. In Annual revenue based pricing, we have added default revenue range, you can add/edit/delete it from configure pricing tool module. In “Fixed Price” fields, we have added “100” by default but you can change it as per your requirements.
When you add “Secondary annual revenue pricing” in configure pricing tool module, it will reflect here. You can select that value from here to manage your selected service.
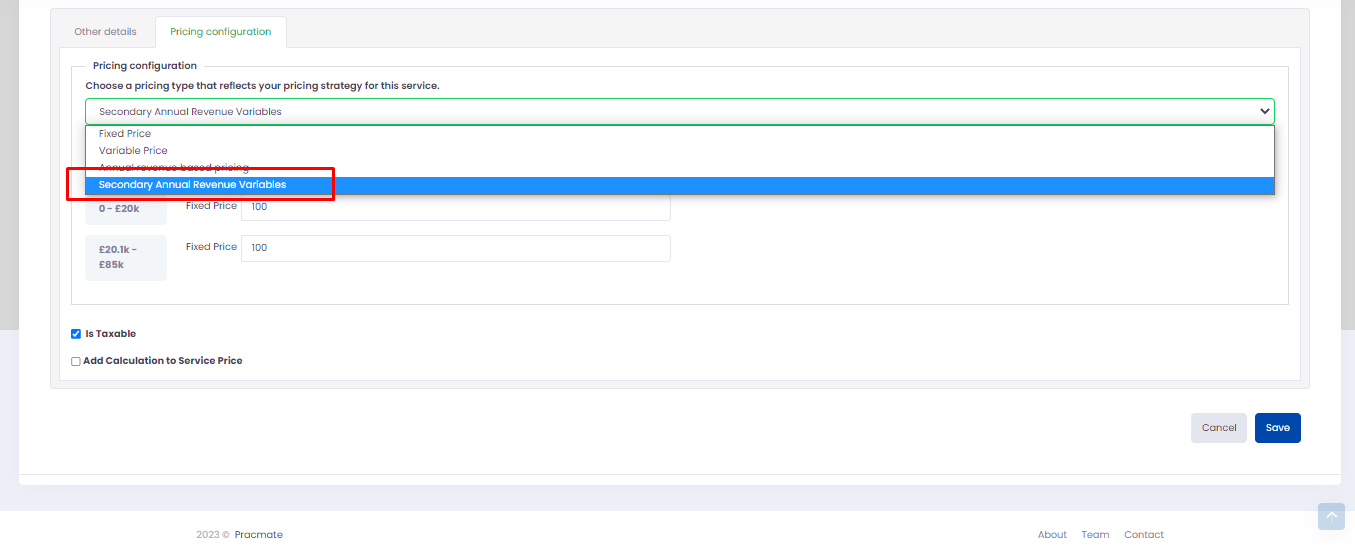
At last, on “Save” button selection, it will update all your changes.
According to your needs, you can add a new template to this page, edit and delete an existing one, you can also create duplicate template using copy template feature, you can not delete default template from here.
You can search the templates you’ve generated here.
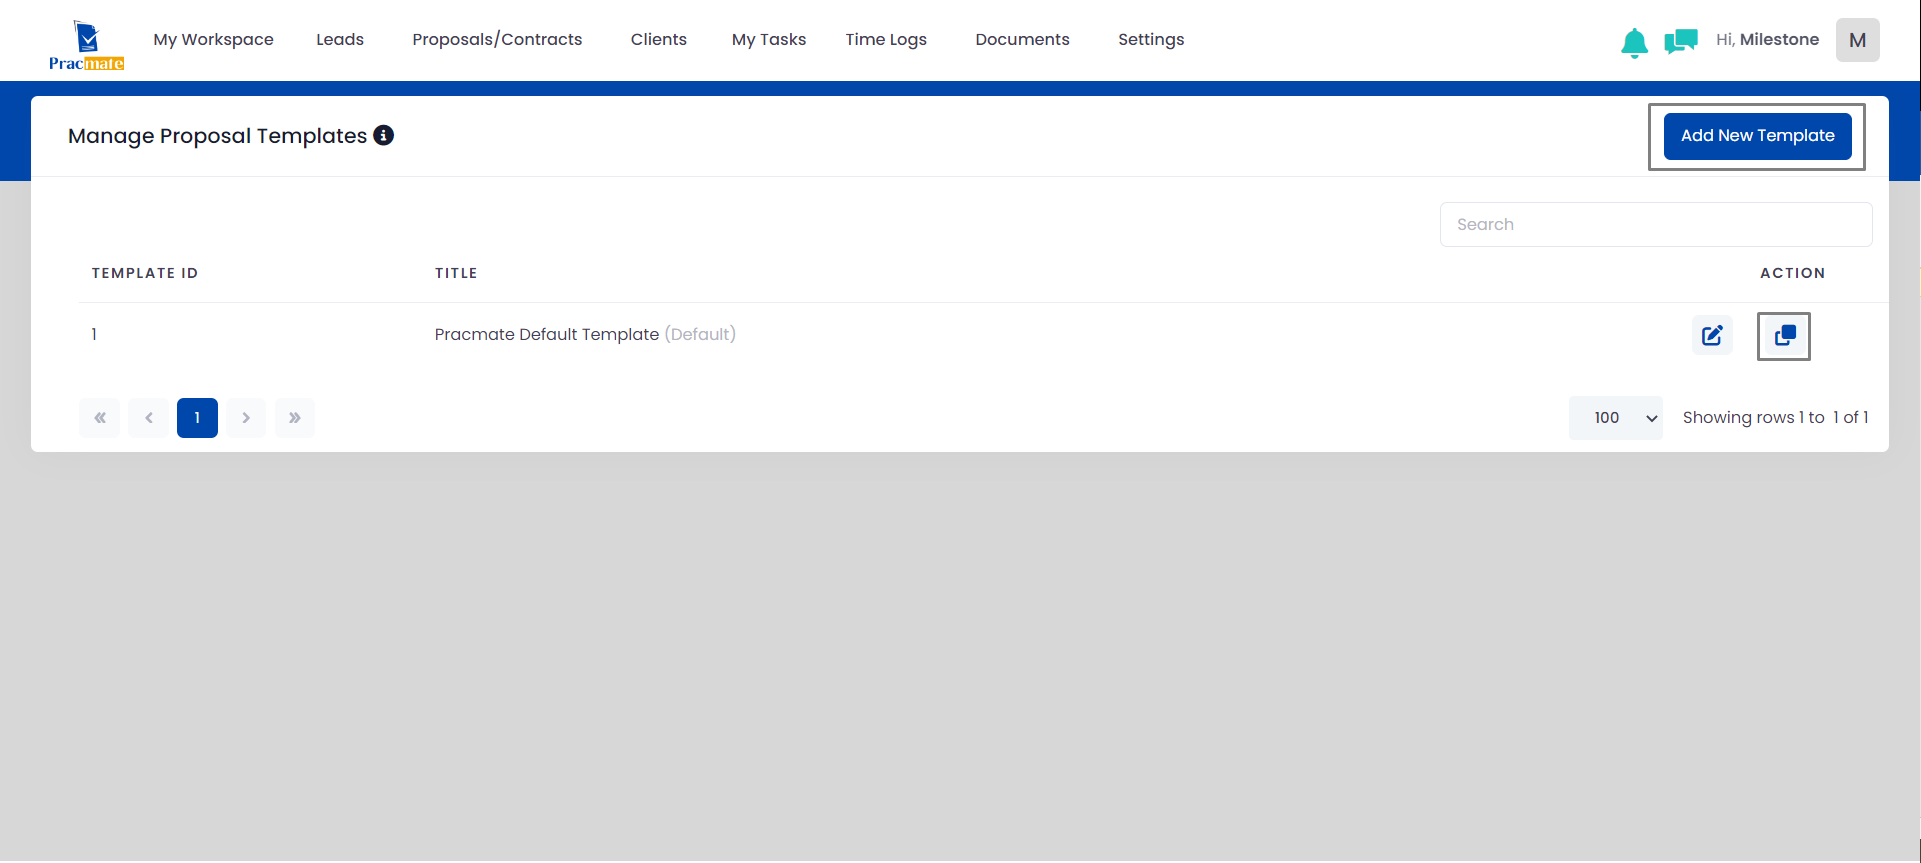
Manage Proposal Templates > Add New Template
Once you’ve filled all the required fields and clicked the “Save” button to create a new template, you can add Email Subject, Email Content, Acceptance to the description and attach any necessary PDF to the particular email template. In acceptance tab, if you selected “Acceptance button” then it will send acceptance button in email. If selected “No Acceptance Required” button, it will not send acceptance button in email.
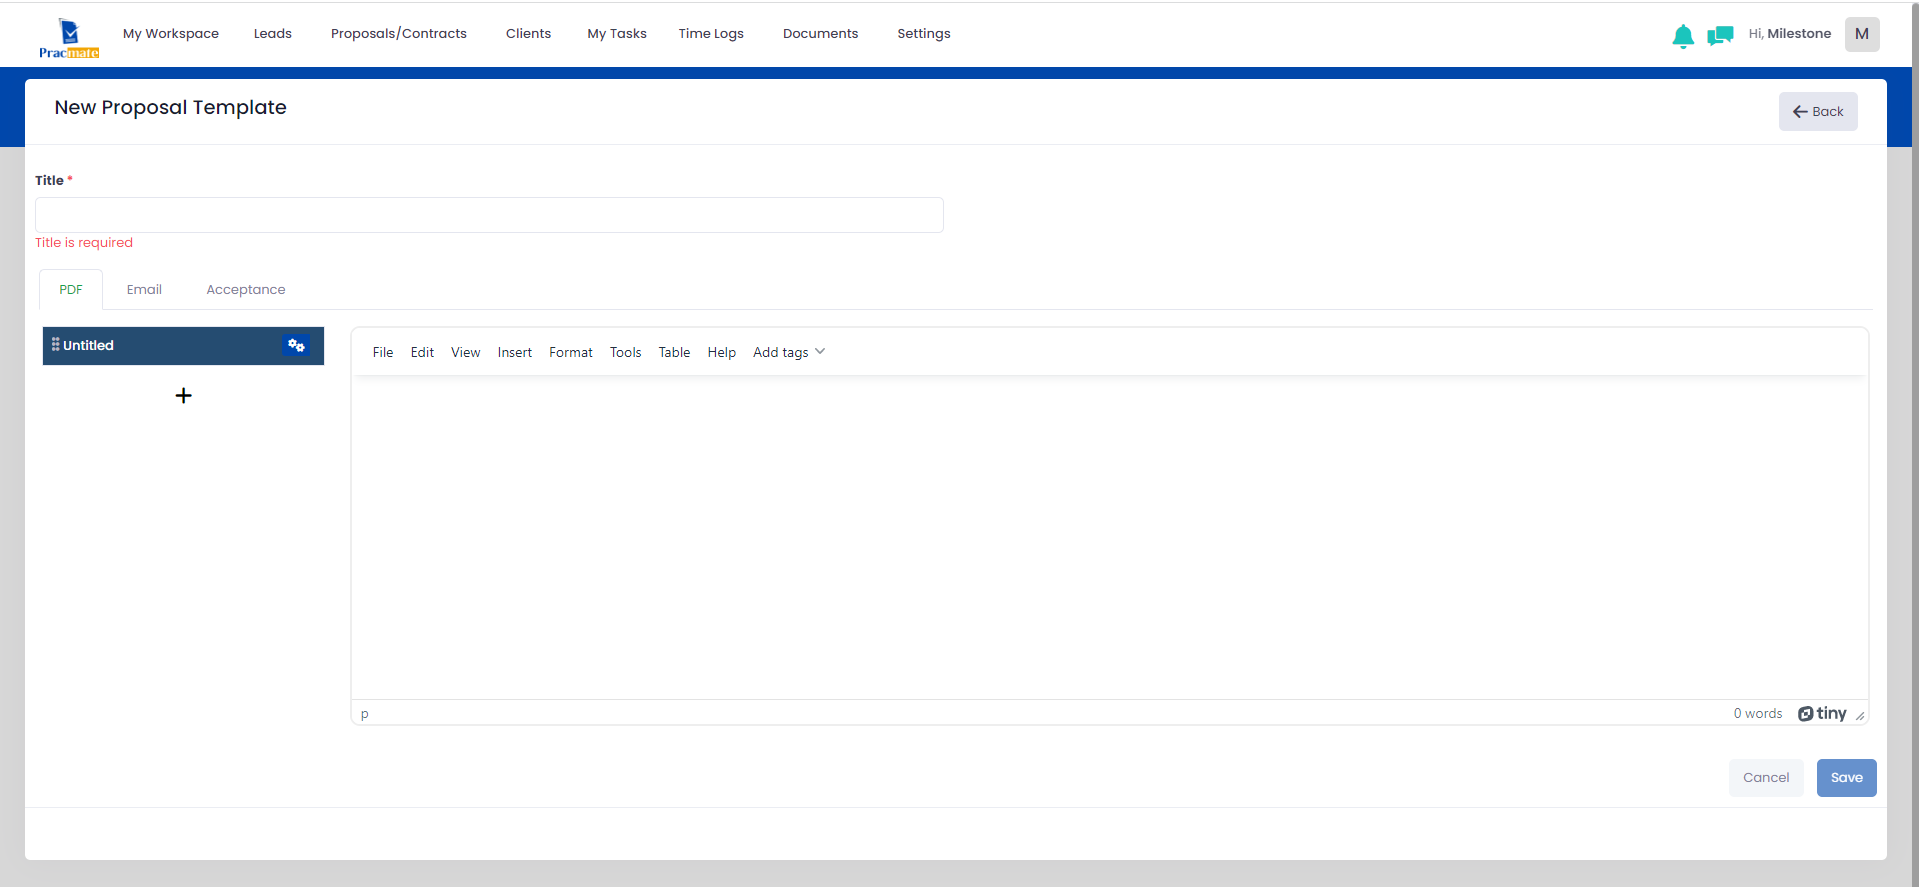
According to your needs, you can add a new template to this page, edit an existing one, or remove it altogether.
You can search the templates you’ve generated here, and you can also use the delete all/delete selected tool to erase every template at once.

Once you’ve filled all the required fields and clicked the “Save” button to create a new email template, you can add predefine tags to the topic and description and attach any necessary documents to the particular email template.
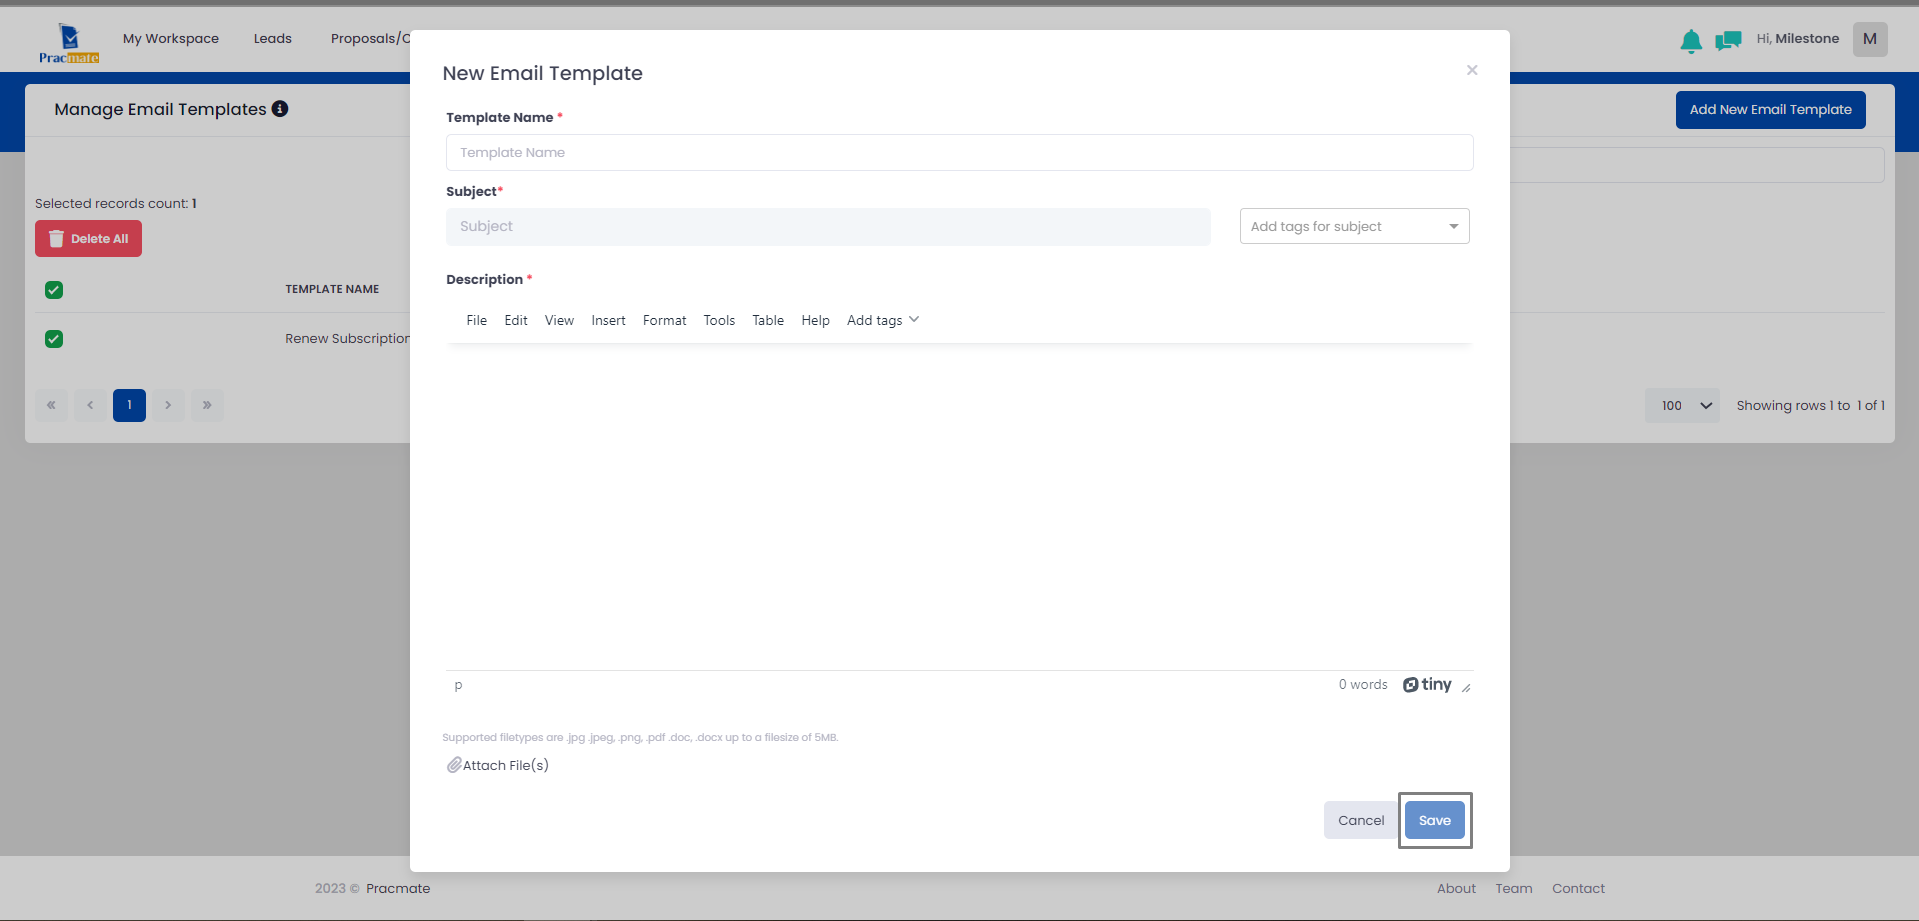
According to your needs, you can add a new template to this page, edit an existing one, or remove it altogether.
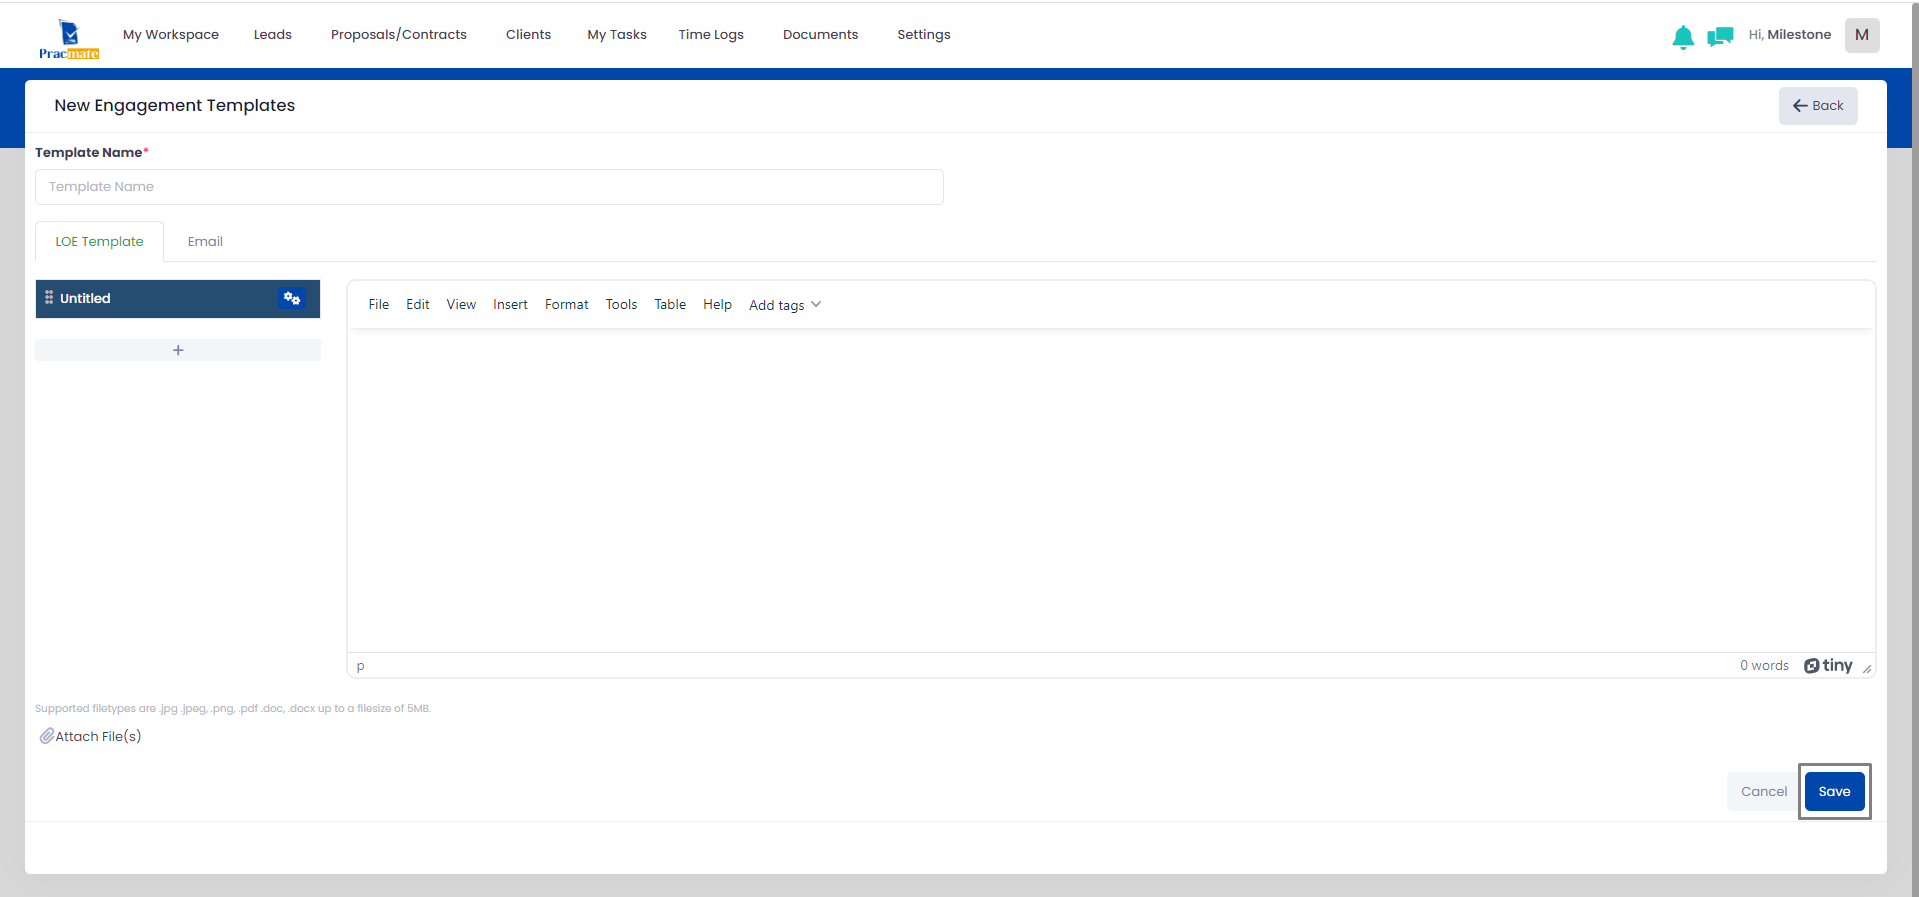
You can search the templates you’ve generated here, and you can also use the delete all/delete selected tool to erase every template at once.

Once you’ve filled all the required fields and clicked the “Save” button to create a new email template, you can add predefine tags to the topic and description and attach any necessary documents to the particular email template.
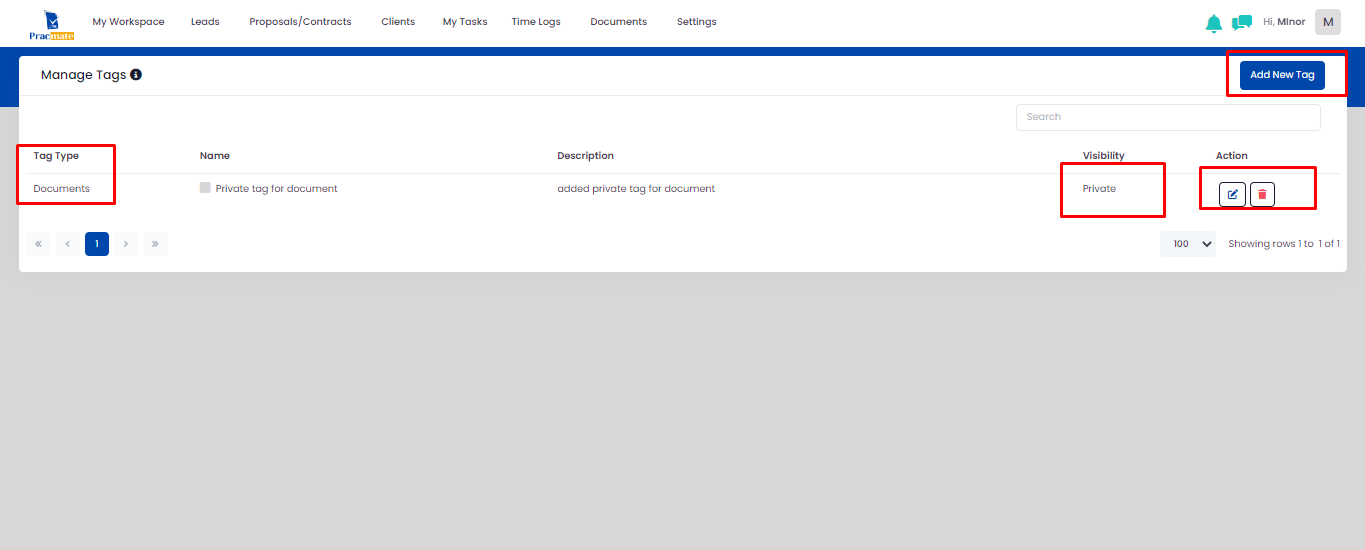
You can manage public & private tags from manage tags module. By clicking on link from here, I will navigate to manage tags listings page.

On listings page, you can Add/Edit or Delete particular tags. To add tag, you need to select “Add New Tag” button. For edit/delete you need to perform from action column. Private tags will only be visible to you & Global/Public tags will be shown to all users.
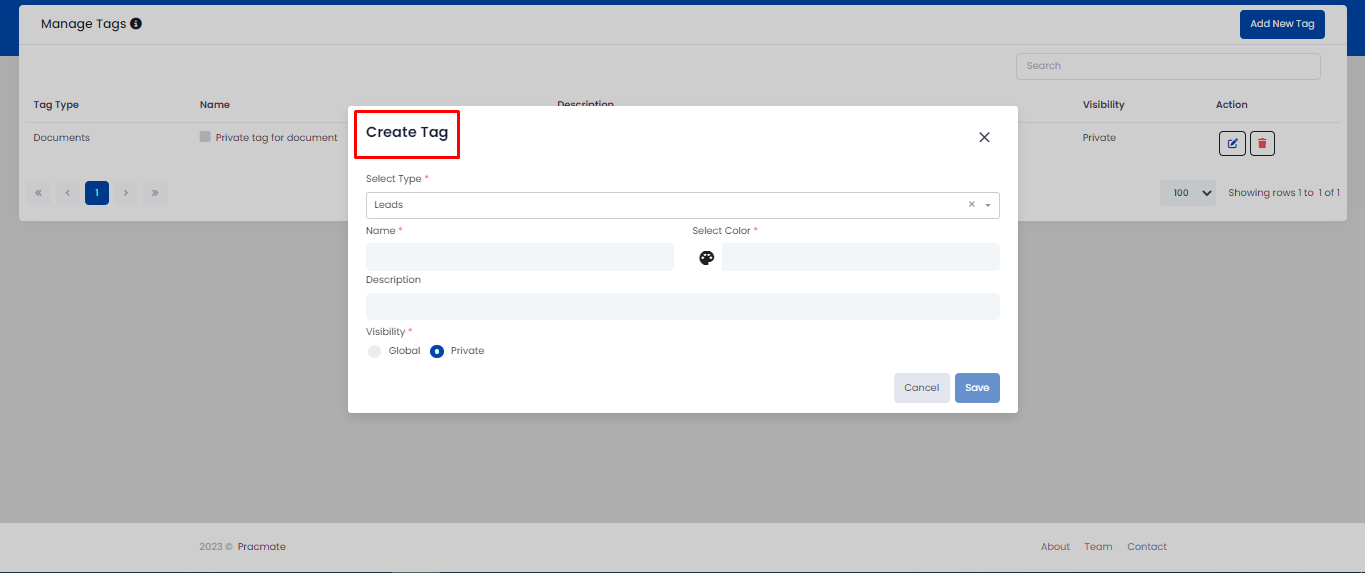
On “Add New Tag” button selection, it will open “Create Tag” popup. You can see particular fields to select/enter. You can select particular type from “Select Type” dropdown. Created tag will be shown to selected type related module. if you select “Lead” in type then it will show in leads module in “select tag” dropdown based on “Visibility” (Global/Private) selection. You can add particular tag name in “Name” field. You can select particular color from “Select Color” field. You can add particular description whatever you want to add in “Description” field. You can select Private or Global visibility option. If private, then it will show only to you & if global then it will be shown to all users. On “Save” button selection, it will create tag & will show in listings page.
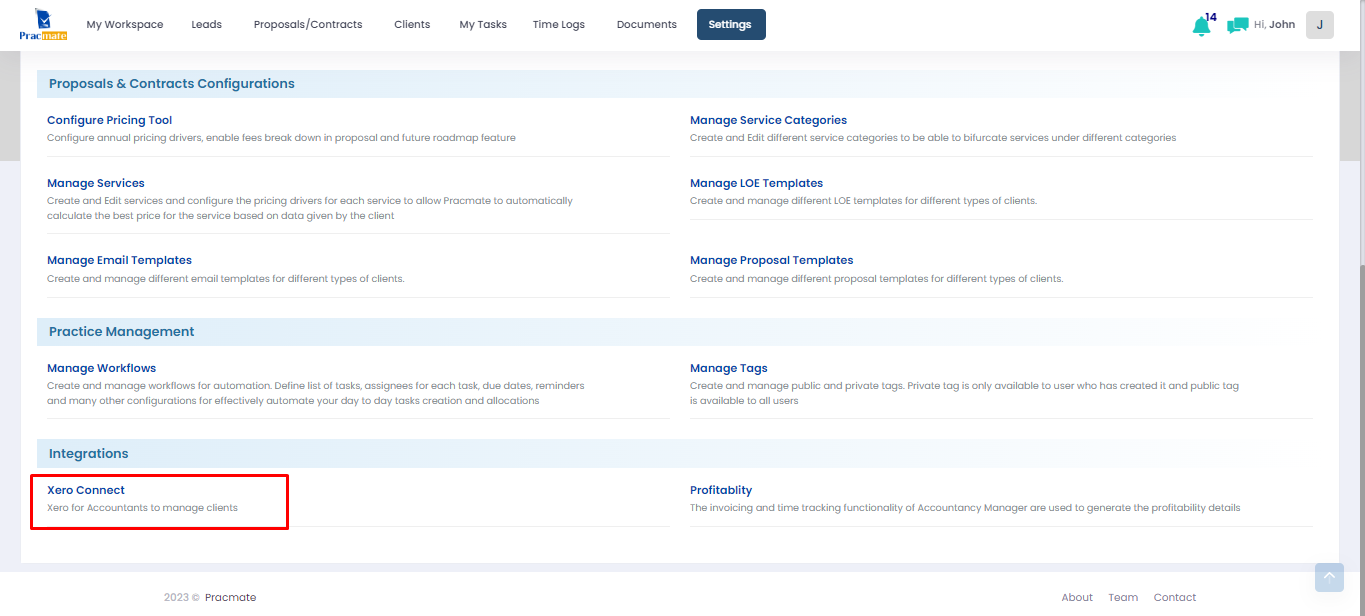
Xero is third party integration software used for accountants to manage clients. On label selection, it will navigate to Xero integration page.
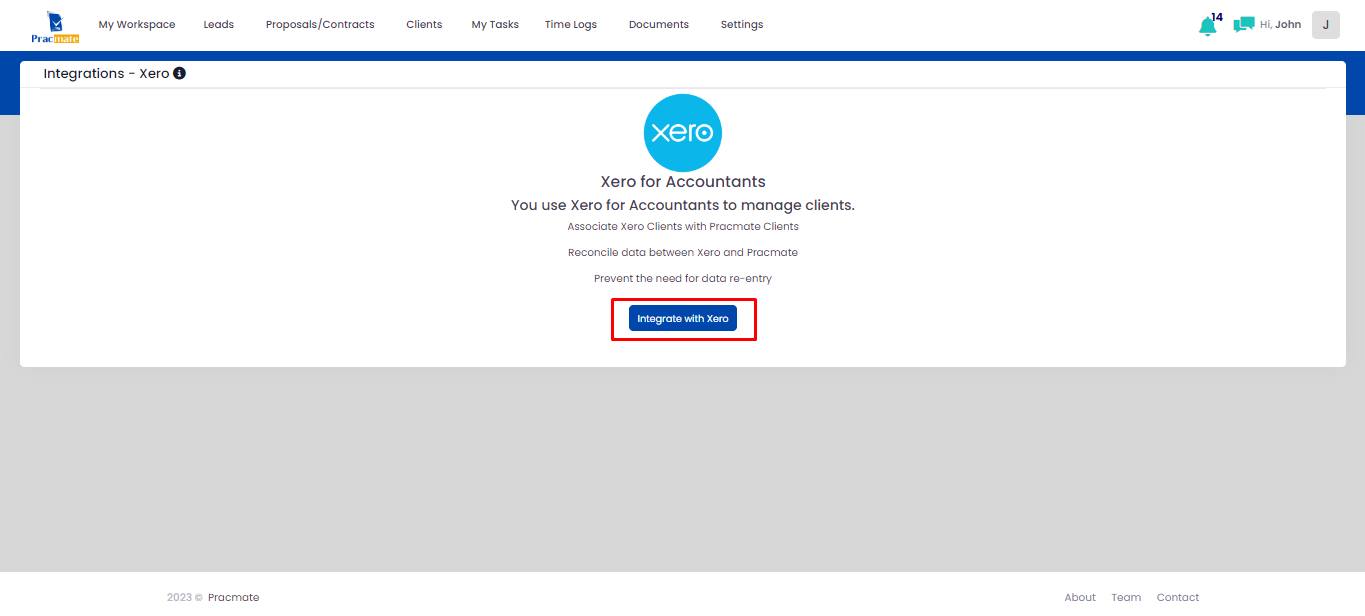
It will show some of xero related details with “Integrate with Xero” button. On button selection, it will navigate to Xero login page.
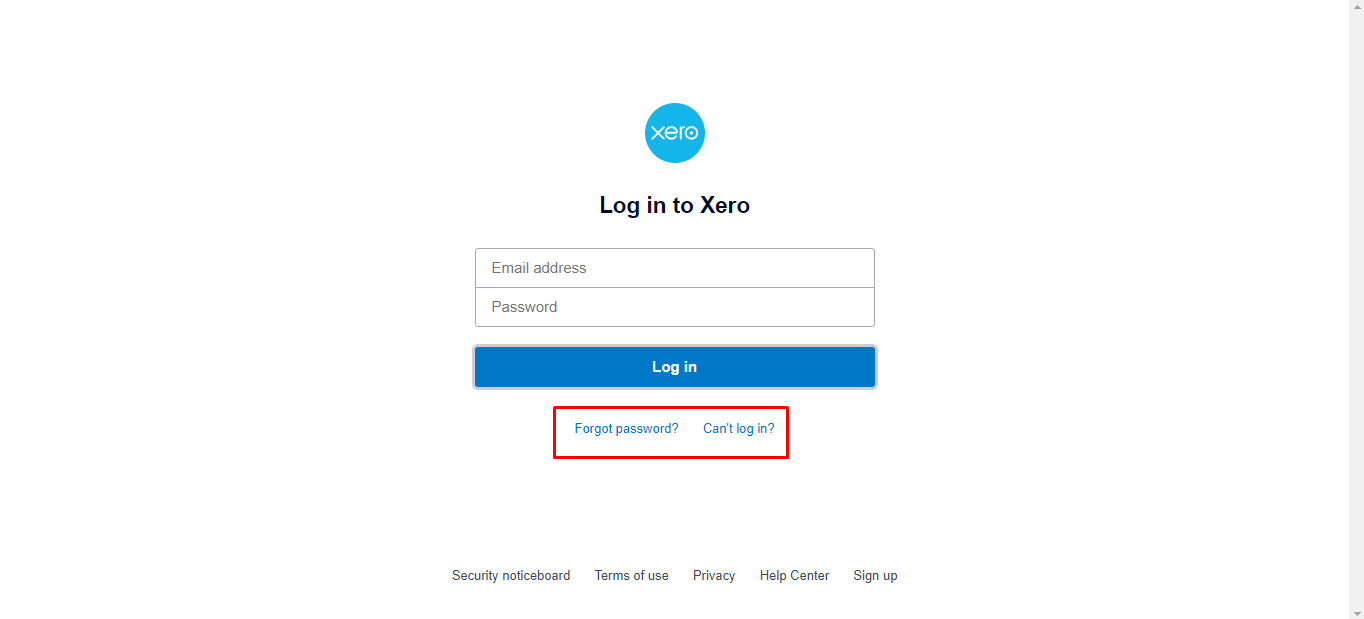
On “Integrate with Xero” button selection, it will redirect to the login page. You can reset your password or create new account from relevant label selection.
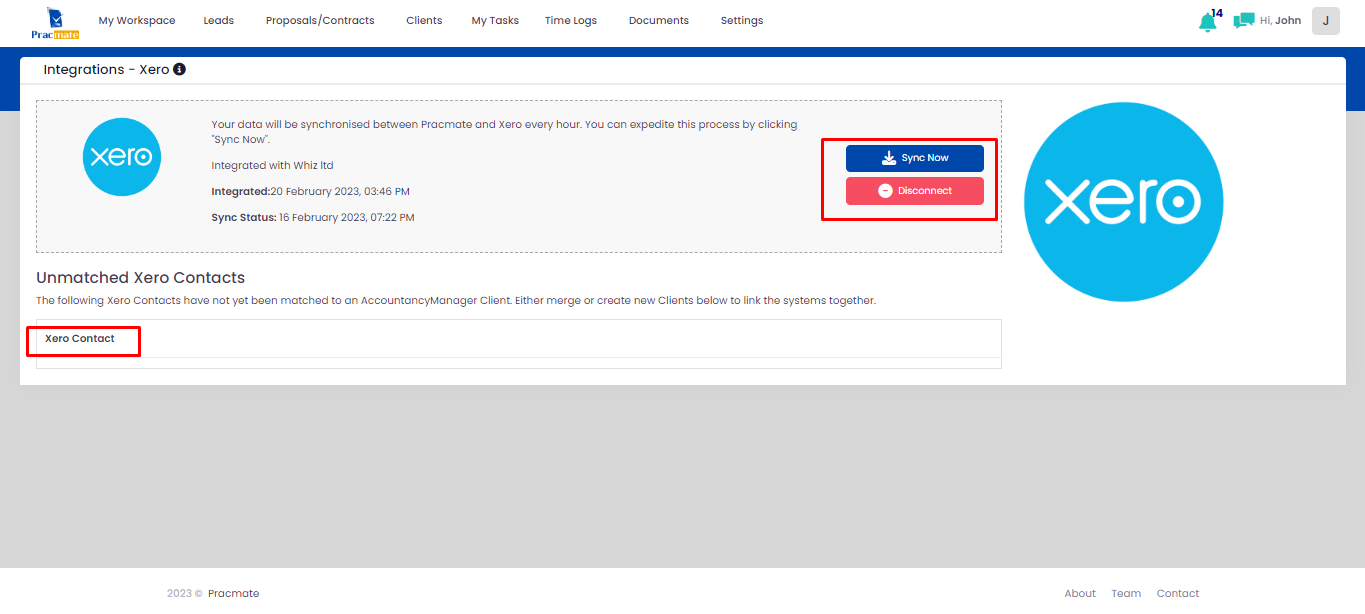
After successfully proceeding with login or signup process, you will navigate to synchronise page where you can sync your invoices with pracmate software by selecting “Sync Now” button. On “Disconnect” button selection, it will redirect to the integrate with Xero page for re-login. If you have created new invoices/contacts in xero, it will show that contacts name in “Xero Contact” lists where you can match contact with particular company. On “Match” button selection, it will fetch all invoices of that contact.
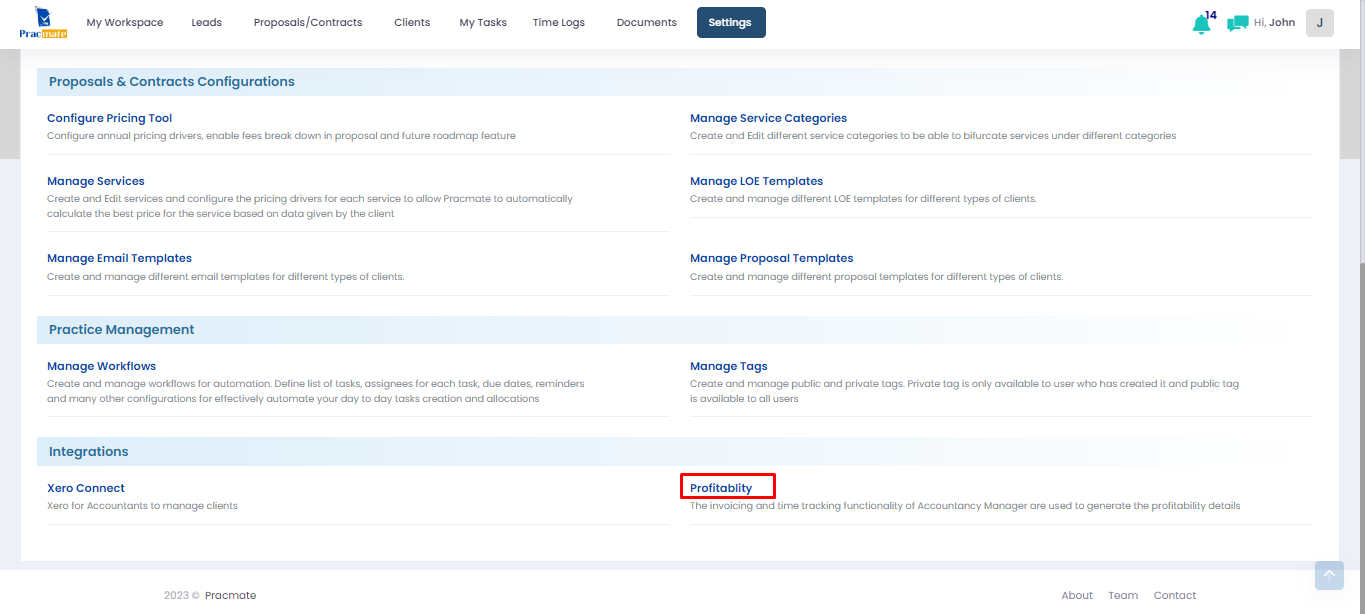
You can generate report of profitability details with fetching invoices from xero & time tracking for time log module. On selection of “Profitability” label, it will navigate to profitability report page.
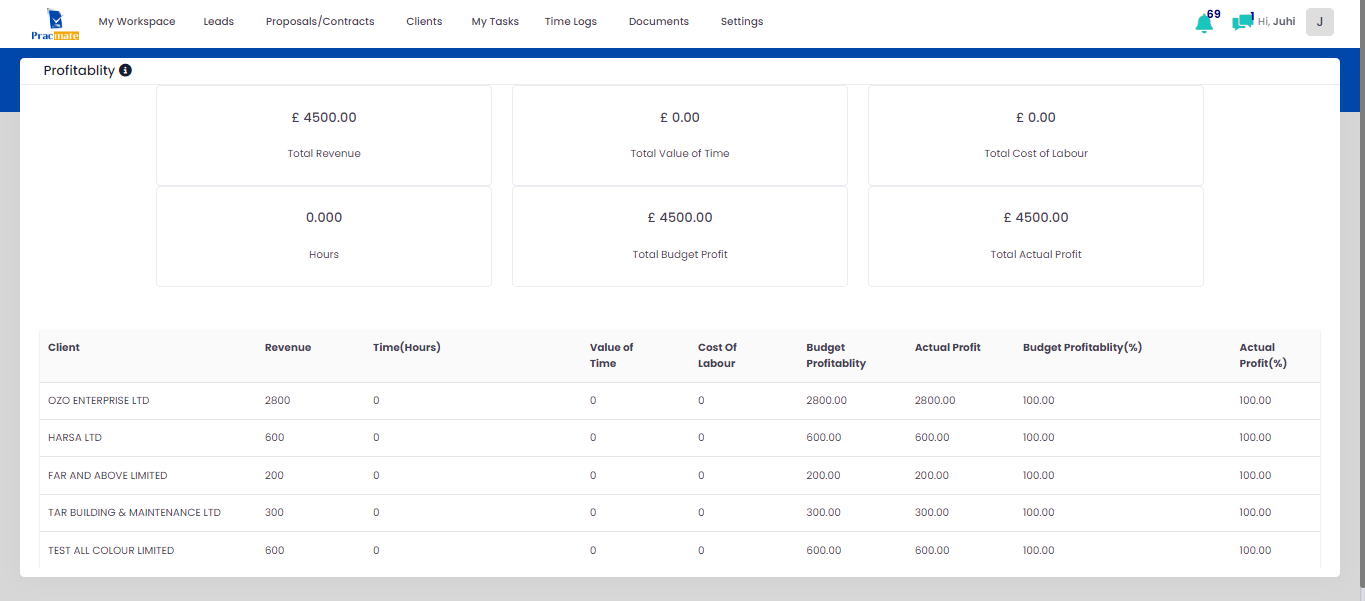
By default, it will show blank client wise listings and it amounts section, it will show “0.00”. When you fetch invoices from xero, it will show fetched invoices as “Revenue” and will show besides matched client name. It will show only paid invoices in report. It will show recorded timings or created time log timings in “Time(Hours)” column. It will show “Chargeable Hourly Rate” & “Hourly Rate” fields amount in “Value of Time” & “Cost of Labour” column.
Revenue and Value of Time differences will show in “Budget Profitability” Column & Revenue and Cost of Labour differences will show in “Actual Profit” column. Based on the amounts, it will show percentages in relevant columns.
On above sections, it will show total of below listings.
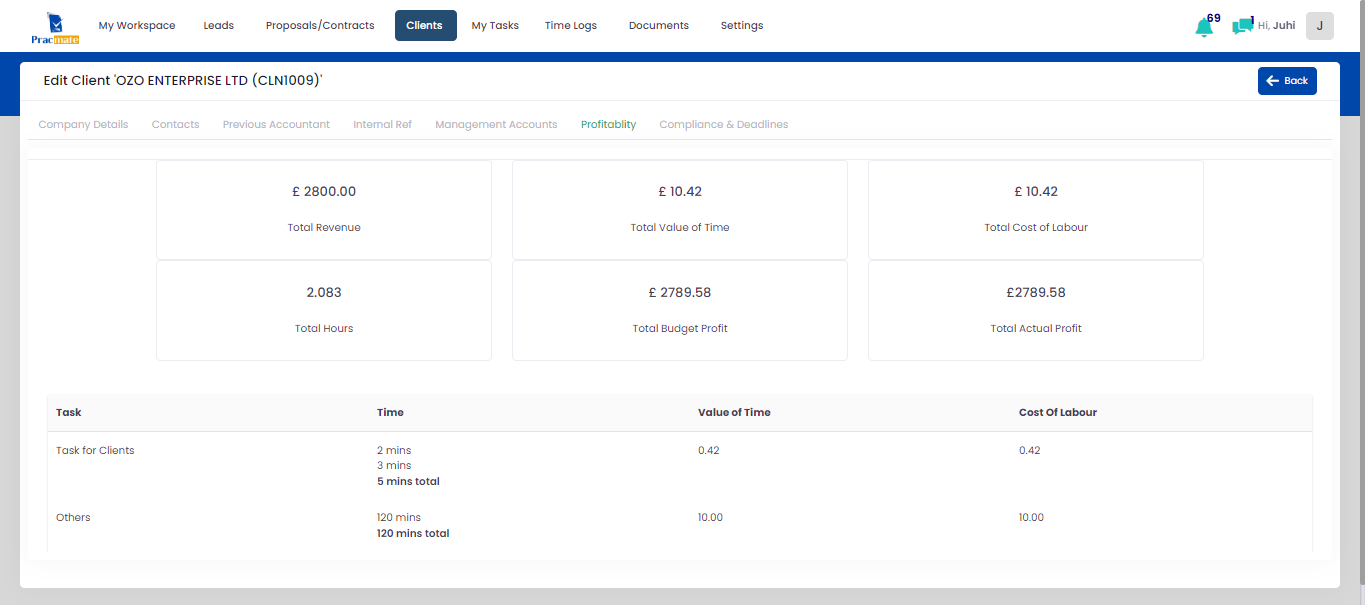
You can find client wise profitability report from particular clients > Edit > Profitability tab. Here you can review client wise revenue, time tacking details etc. if user performed time tracking for the same task, it will show time wise different entries with total timings.