Help Center

Help

Leads

1How can I manage leads ?

  • You can Manage leads, set follow up dates, set ratings and keep track on the progress through progress notes.
  • If we convert Lead into Client it will move to Client.
  • By default it will display listing page along with Add New Lead and Search option on page.
  • After adding new lead it will display table as Lead No., Company Name, Client Type, Lead Owner, Status Lead Rating and Actions with View, Edit, Create Proposal, Add Note, Delete options.
  • Lead No.: It will display lead details.
  • Company Name: It will display lead details.
  • Client Type: It will display Client Type based on the selection.
  • Lead Owner: It will display Lead Owner from the Internal Ref.
  • Status: It will display Lead Status from the Internal ref.

Search

It will display search option with many filters like…

Select Tags(s), Select Lead Rating(s), Select Lead Owner(s), (s) Select Client Type(s), Select Lead Status(s), Select Next Follow up date.

Based on filter it will display result respectively if it’s present, either it will display No Result Found.

Reset – If user have applied search filter then it will be reset the filters.

2How can I add new lead ?

  • Click on Add New Lead button.
  • It will open Create New Lead page along with Company Details, Contacts, Services Required, Previous Accountant, Internal Ref tabs.

Company Details:

  • Client Type: There are different types of it and based on selection of type it will display options.
  • Type is Private Limited Company, Public Limited Company, Limited Liability Partnership, Partnership, Self-Assessment, Trust, Charity, Other.
  • Company Search: If user wants to find their company details then it will be used for Search Company which are existing and call from API to retrieve the data.
  • If the option is not on it will not search the company data.
  • Company Name *: It is mandatory field.
  • Company Number: It is an option field.
  • Business Activity: It will display a list of Business Activity like Apparel, Banking, Biotechnology, Chemicals, Communications etc.
  • Country Of Incorporation: It will display a list Country Of Incorporation like England and Wales, Northern Ireland, Scotland and Wales.
  • Incorporation Date: incorporation date means the date on which the Corporation is incorporated into a public company and issued with a certificate to commence business.
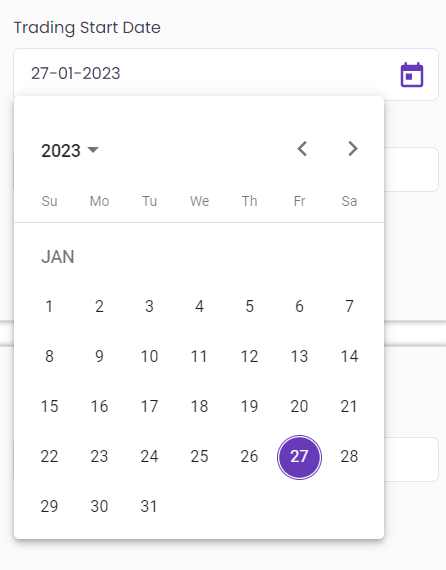
  • Trading Start Date: It is just field for Trade start of company.
  • Entity Type *: It is mandatory field and it will display a list of Entity Type like Small Business, Large Business, Property Business, Contractor like Sole Trader, Private, Construction, Partnership, LLP, Individual.
  • Company Email Address *: It is mandatory field.
  • Country Phone Code*: It is mandatory field which display country phone code list.
  • Company Phone No. *: It is mandatory field.
  • SIC Code: It will display list of codes from 1110 to 99999.

Registered Office Address:

It will display office address fields and if it is company search then retrieve all the data from the API.

Trading Address:

  • Copy Registered Address: It will copy the same Registered Address in to Trading Address.
  • Trading Name: It will be the Company Name.

Save & Exit: After fill all the require details it will save the lead and redirect on Leads listing page.

Save & Next: After fill all the require details it will save the lead and move on next tab Contacts.
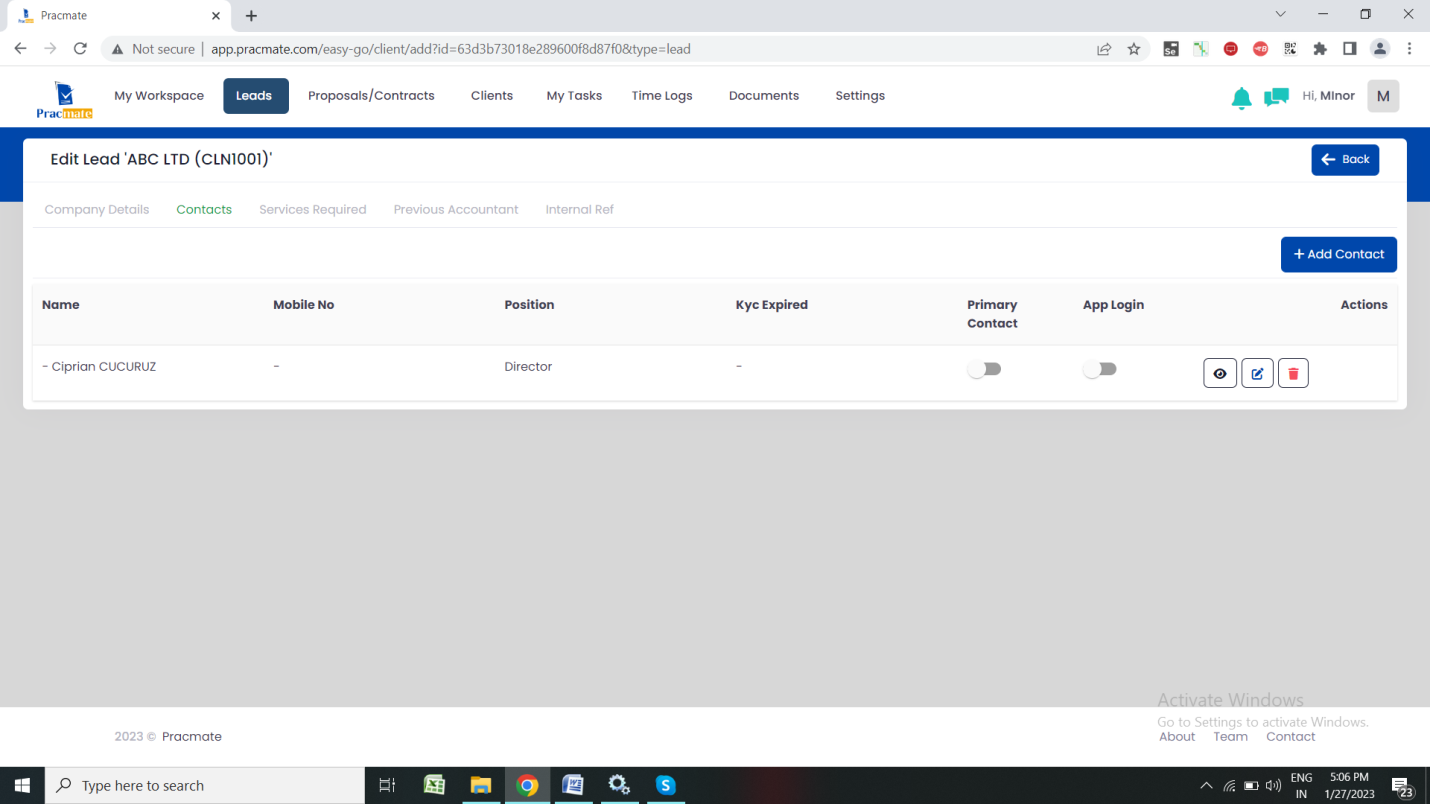
  • By default, it will display listing page along with Add contact button on page.
  • After add new contact it will display table as Name, Mobile No, Position, Kyc Expired, Primary Contact, App Login and Actions View, Edit, Delete.
  • Primary Contact: It will be select as Primary Contact.
  • App Login: It will access to app login from mobile app.

Add New Contact :

Click on Add Contact button it will open Create Contact form.

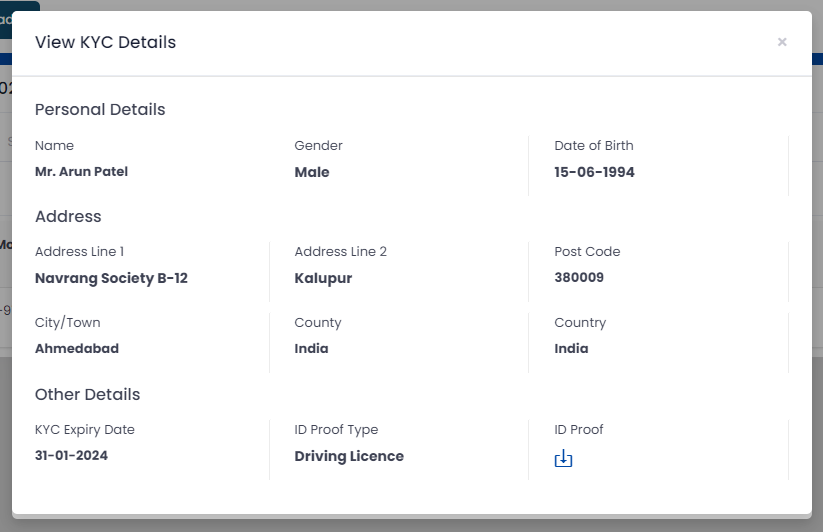
Add KYC :

View Contact Details and then check for KYC List: Add KYC.
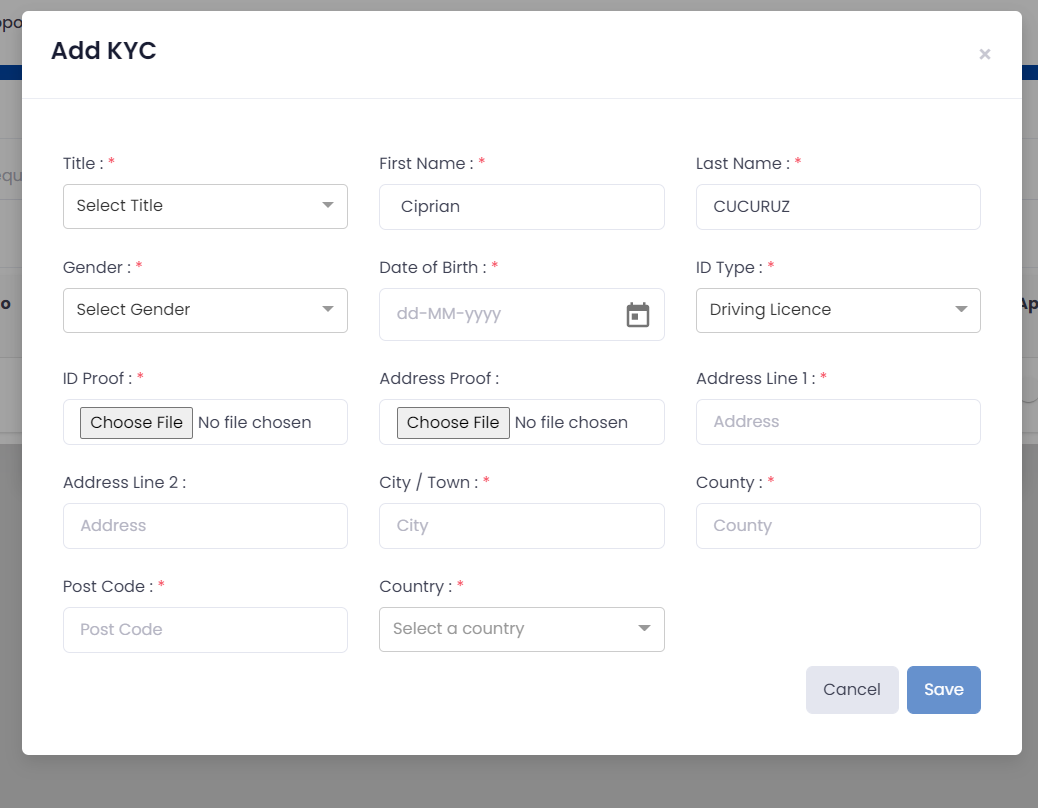
  • Add KYC: It is form for KYC and based on ID Type it will display fields.
  • After selecting require KYC details and Save it will display in KYC List of Contact.

Service Required :

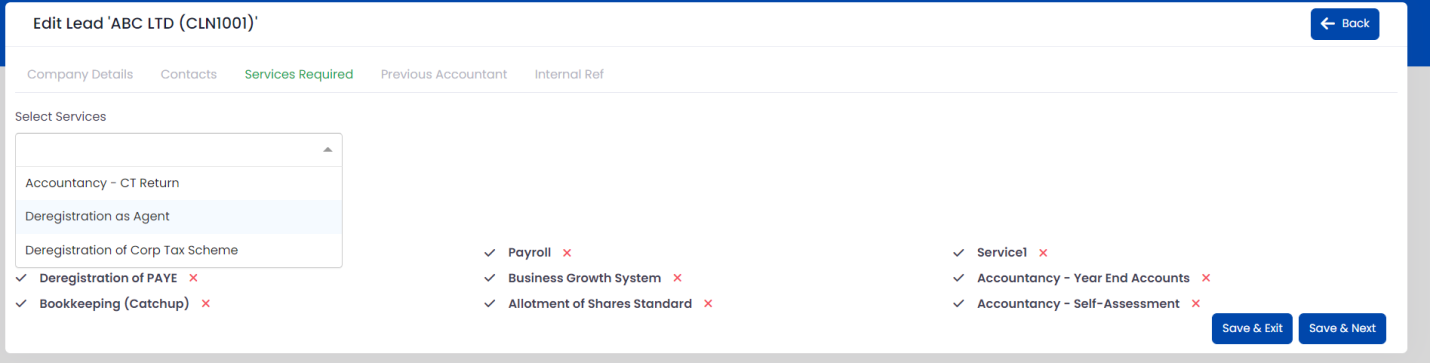
  • It will display list of services and Selected Services is display on page.
  • User can remove the selected service by clicking on cross icon or by pressing backspace from the keyboard.

Save & Exit: After fill all the require details it will save the lead and redirect on Leads listing page.

Save & Next: After fill all the require details it will save the lead and move on next tab Previous Accountant.

Previous Accountant :

If you require clearance from the previous accountant for this client then turn on the Clearance Required button. Once the Information Received is marked no further emails will be sent. Previous accountants will not receive clearance emails if the client is still a prospect.

  • It will ask for Accountant Name, Accountant Email, Accountant Address, Clearance Required and Information received.
  • If user wants Clearance Required then it will ask for Send first clearance email on,Send request after every day, Last email sent on and Email Template.
  • Send first clearance Email will be sent out 9am on the selected day. If today is selected, email will be sent out within minutes. Go to Settings > Templates to edit clearance emails.
  • Send Request Day: It will display list of days like 1 Day to 21 Days.
  • Last email sent on: If the first clearance email is sent it will display the date on which date it sent based on send request day it will updating the date.
  • Email Template*: It will display list of templates and based on it will send the email.
  • Information received: If it received all the required information of client then it will marked as Information received.

Save & Exit: After fill all the require details it will save the lead and redirect on Leads listing page.

Save & Next: After fill all the require details it will save the lead and move on next tab Internal Ref.
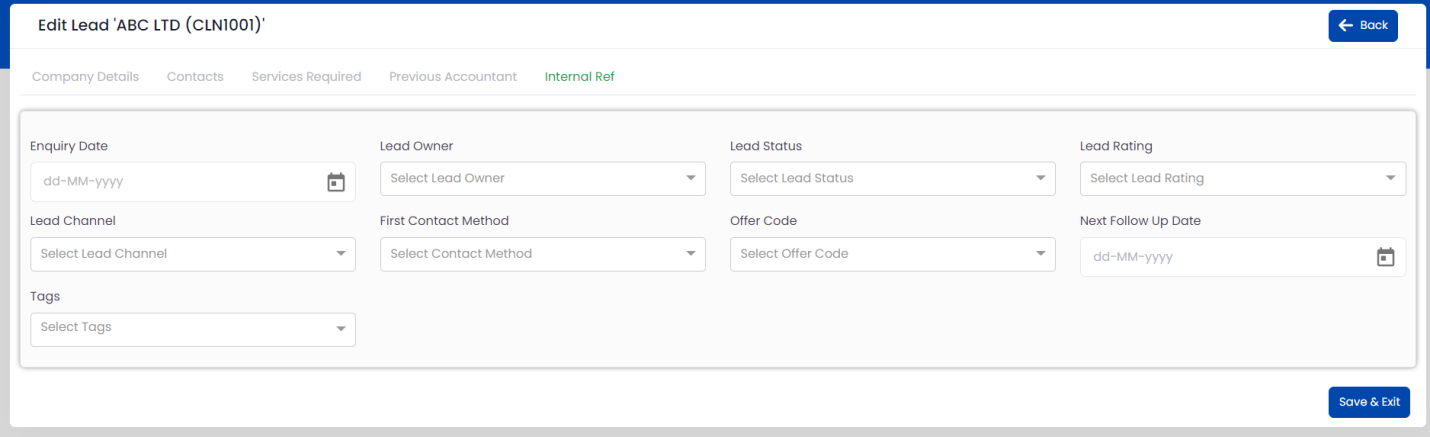
Internal Ref:

  • Enquiry Date: Where user have do enquiry will select the date.
  • Lead Owner: It will display list of staff
  • Lead Status: It will display list option like Added, Responded – Lead to Contact, Quote Sent etc.
  • Based on lead status we can check progress of lead.
  • Lead Rating: It will display option like Hot, Warm and Cold.
  • Lead Channel: It will display list option like Referred by existing client, Referral, Google, Facebook, Walk-in.
  • If we select Referred by existing client, then we need to select client.
  • First Contact Method: It will display list option like Email, Telephone, Live chat etc.
  • Offer Code: It will add from settings and based on offer code it will work.
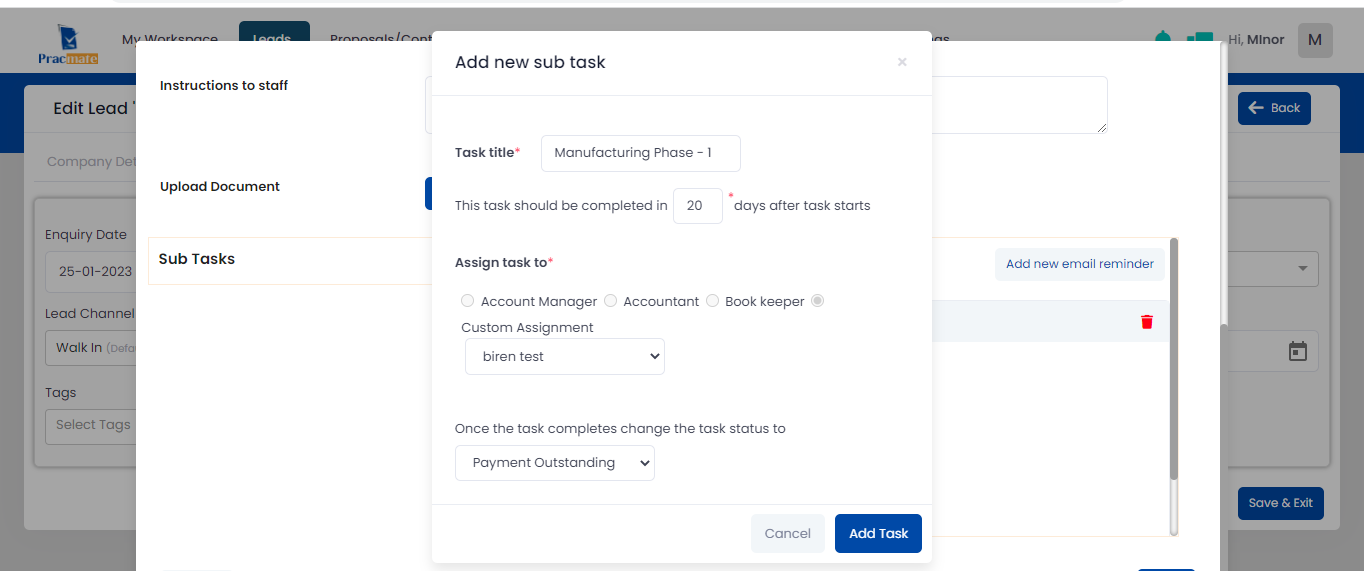
  • Next Follow Up Date: We can select next follow up date. On date selection, it will open task popup to add new task. You can close popup without adding details, if you don’t want to add. New added task will show on my tasks page with relevant details.

User can add Sub tasks. For brief details, you can check workflow/tasks pages related user guide.
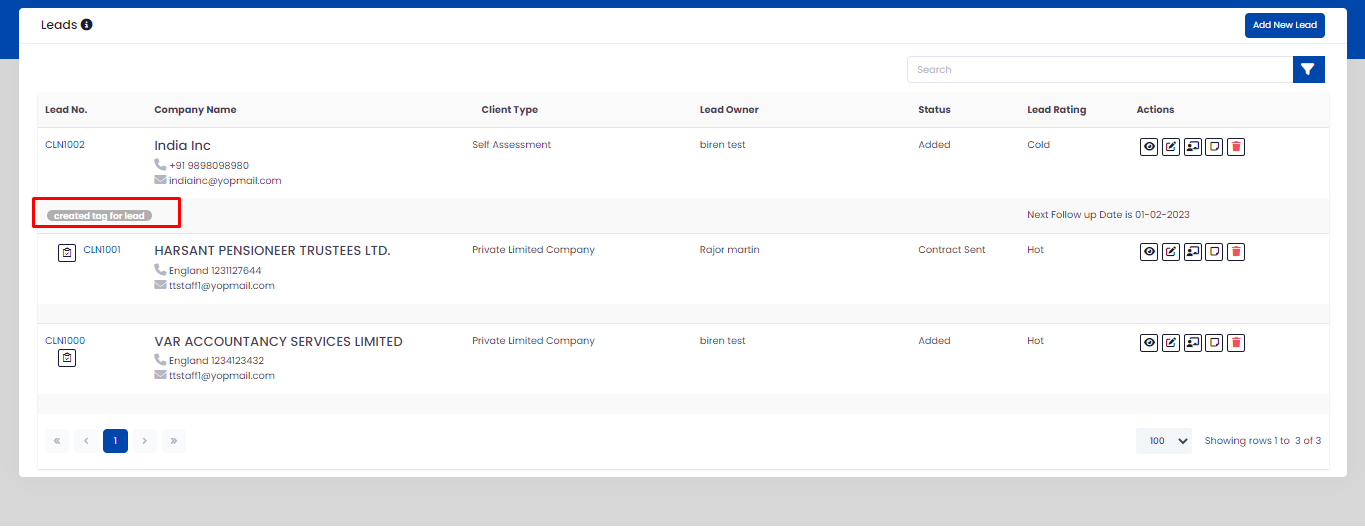
It will display next follow up date on listing page if user have selected and create the task.

Tags: It will add from settings and based on tags it will work. It will show added tags on listings page.
Save & Exit: After fill all the require details it will save the lead and redirect on Leads listing page.

3How can I view lead details ?

It will display the lead details along with Create Proposal, Convert to Client and Edit option.
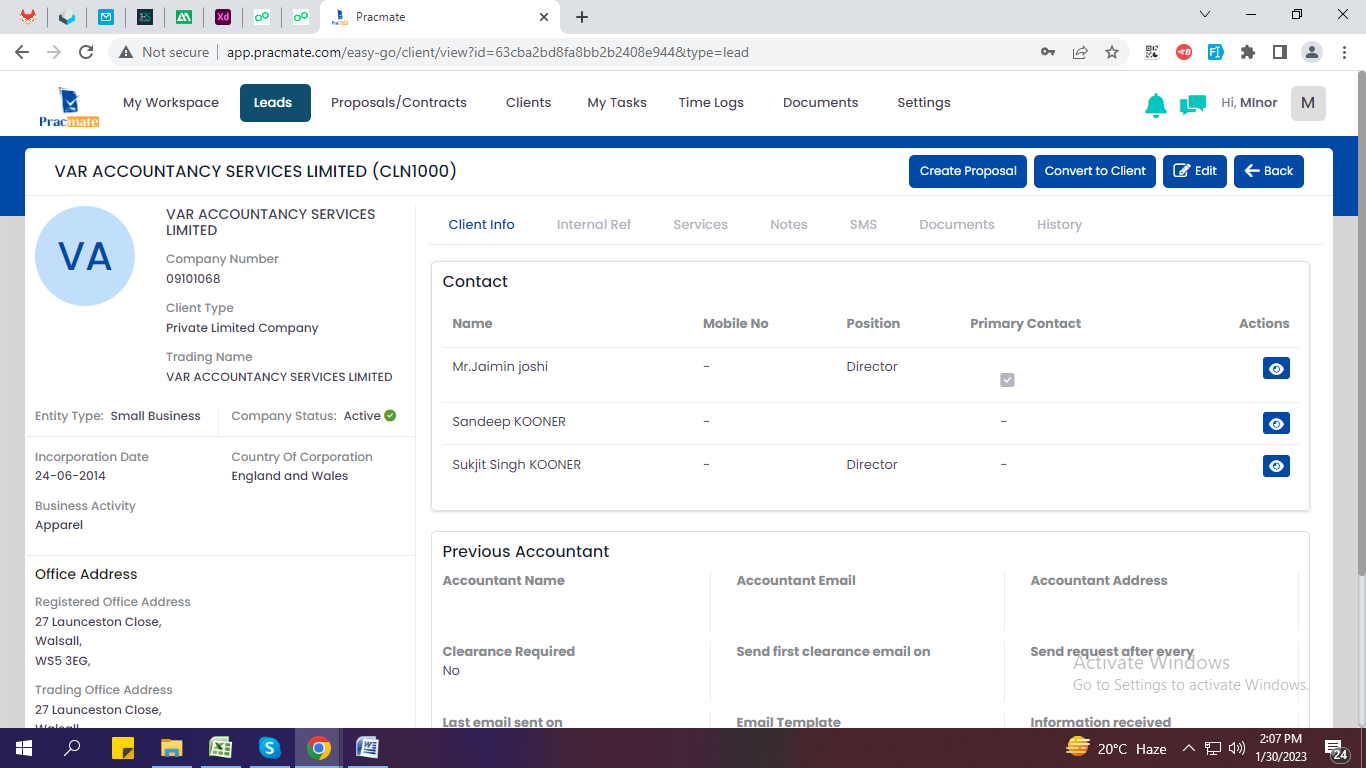
Edit – It will display the lead details and by making require change it will update the lead details respectively.

Roadmap Services – If there is any contract generated & approved from client then it will display details of that roadmap.

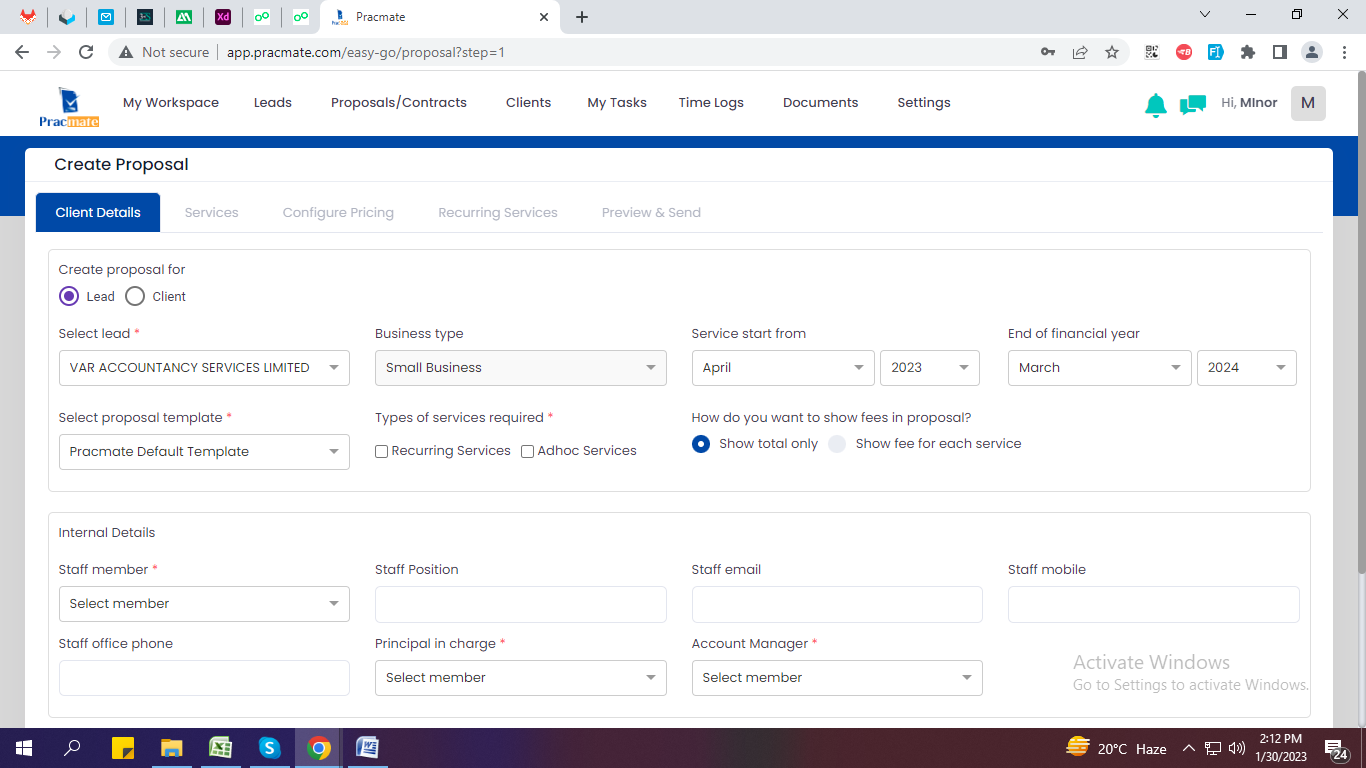
Create Proposal – It will be redirect on Proposal/Contracts page with all the information and display the details based on Lead/Client respectively.
Convert to Client – It will convert leads in to client and will display in client page.

4How can I add note ?

User can add Note as well as create task on it. Task will create based on the toggle button selection. If it is active, then it will open task popup when save note.

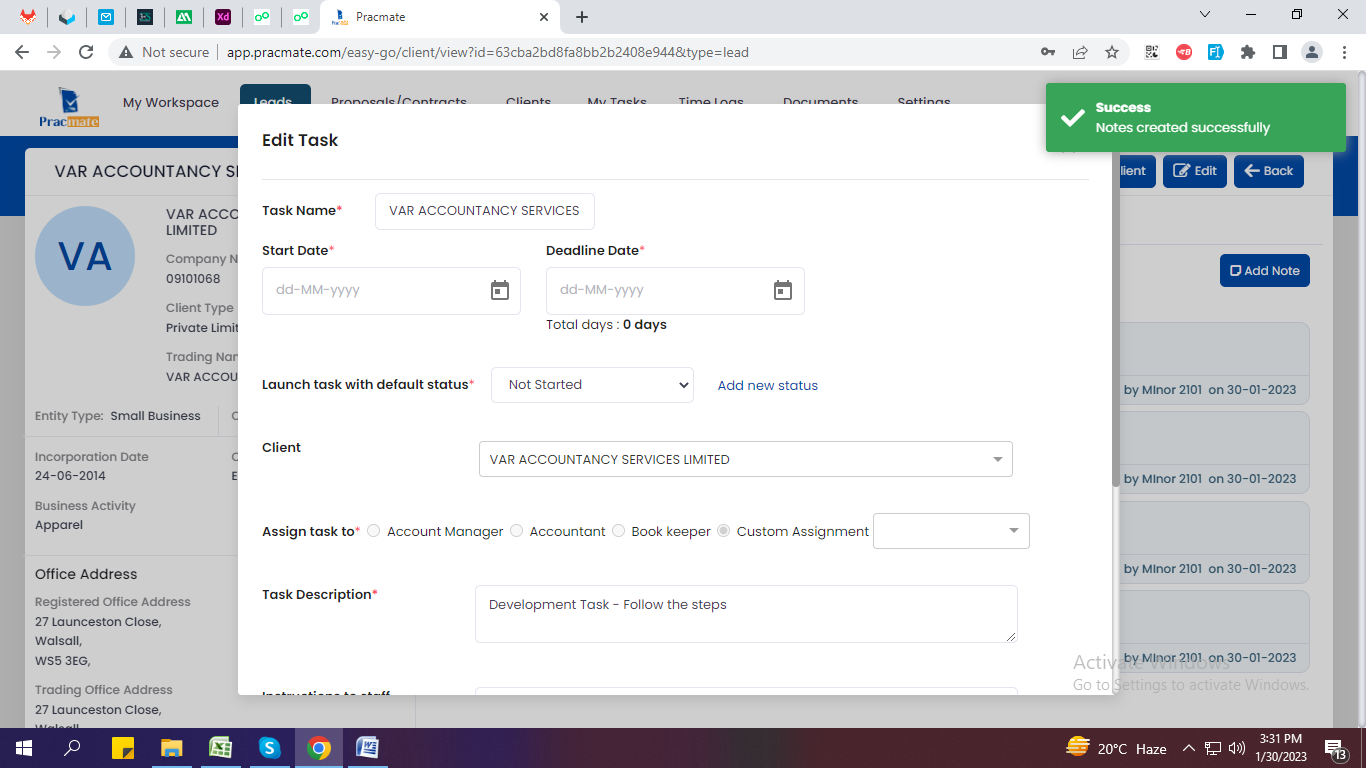
Created task from notes will show with “View” icon besides “Added by” label. On view icon selection, it will open popup with already added details, user can edit details from here.

Also it will display the latest notes on listing page by hover on an icon.

5How can I manage SMS ?

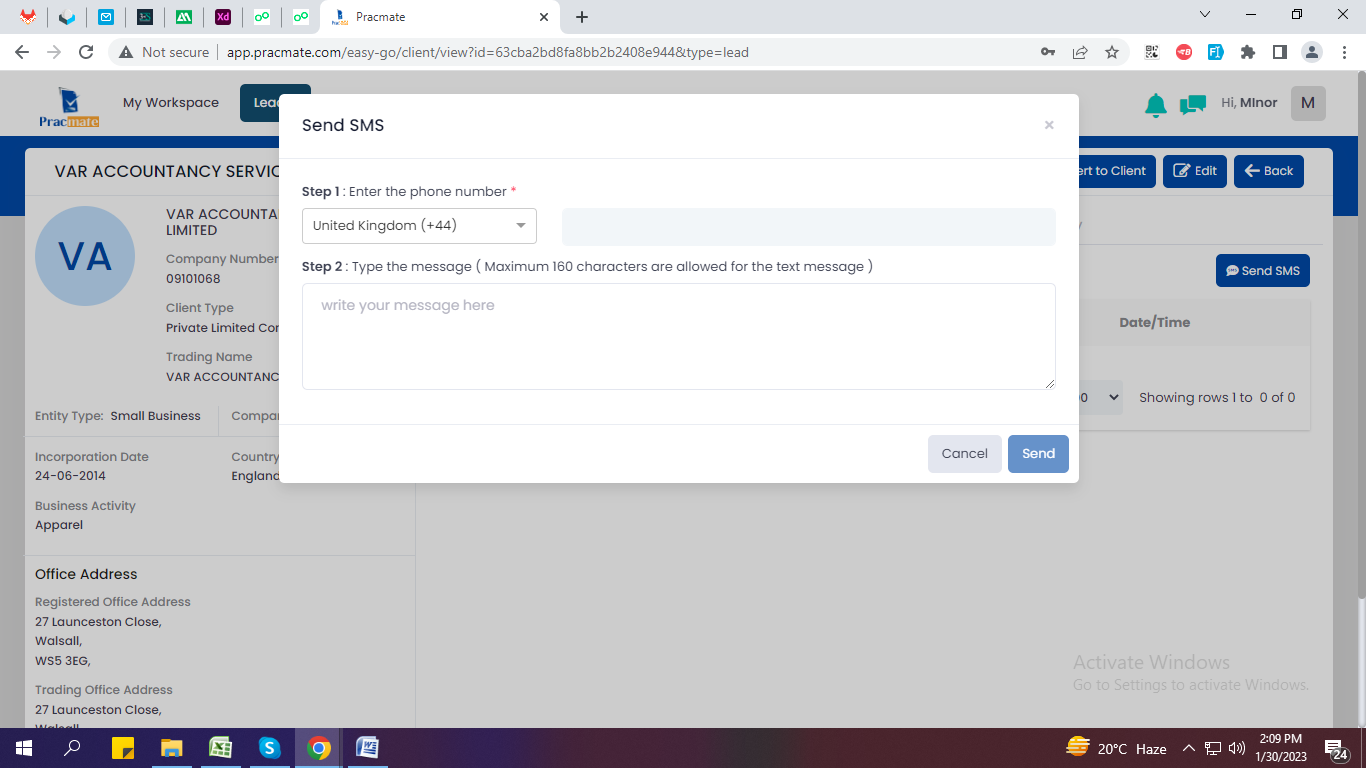
By default there is no SMS credit so user need to first buy the SMS Credit, it will display Add credit option with different SMS package.

SMS will be send only in 2 steps.

If SMS is sent, then it will display the details on page along with Date/Time.
6How can I manage documents ?

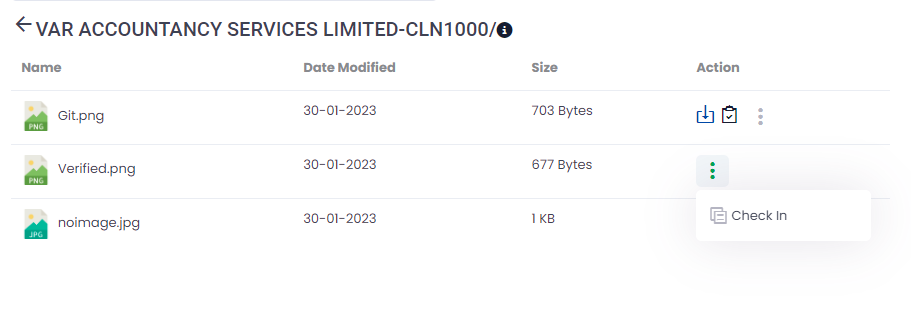
It will display company name and ID as folder name.
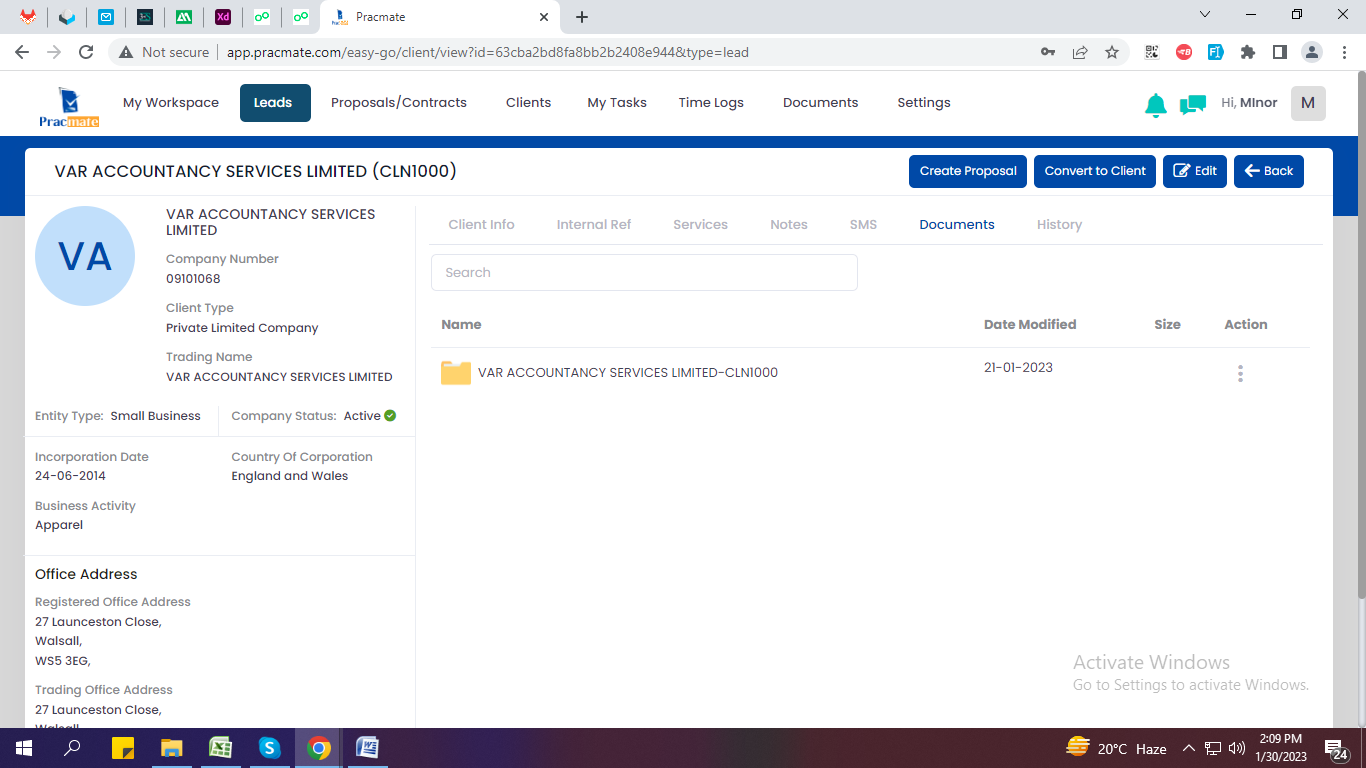
Open the folder name will display search bar & Add Folder and Upload file option will be based on the permission.

Create Folder + Upload Files – It will be display based on permission from settings.

It can be display download and notes option.

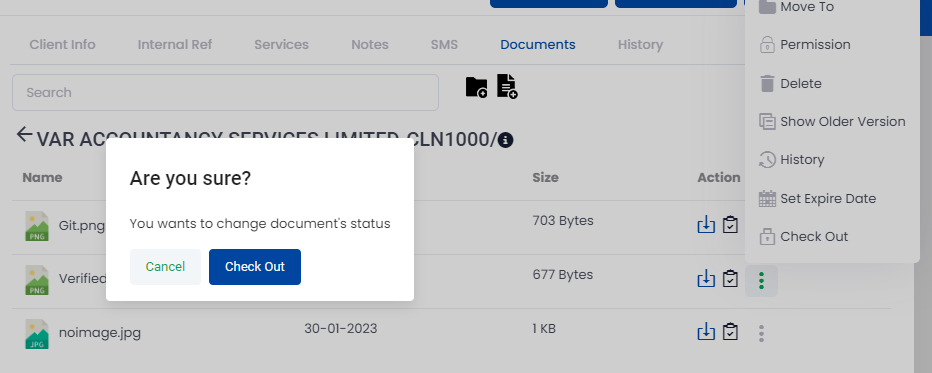
it will allow Move to, Permission, Show Older Version, History, Set Expire Date and Check Out etc. all features will be based on given permission to the staff members or roles.

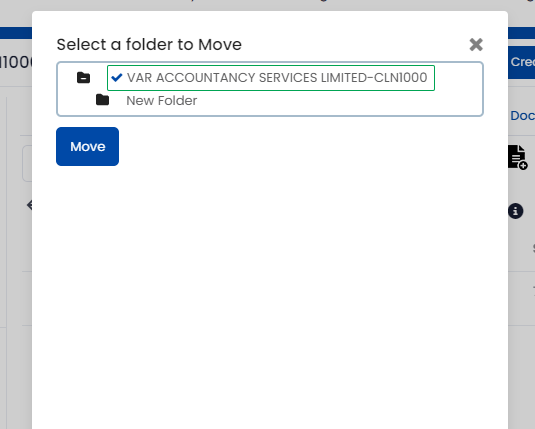
Move to –Select a folder to Move file.
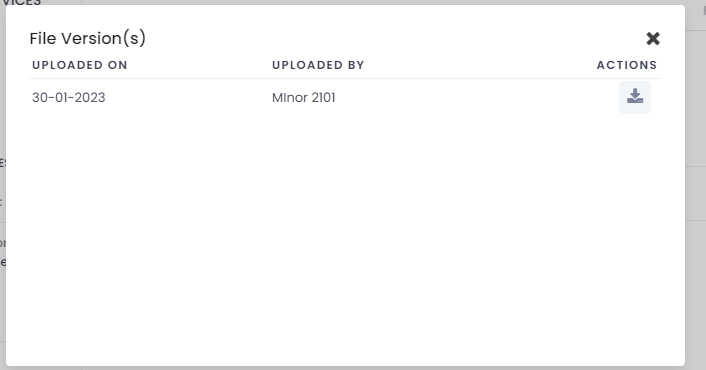
Show Older Version – If you are uploading same file at same location, old file replaces with new file and old file stored as a version.
Permission – Based on selection of role and user permission it will display file to staff and it’s actions.

By default, there is Deny permission to staff user. Once you allow particular permission to staff or role, it will reflect same in staff/role users.

Expiry Date – It will display expiry date selection, send reminder to client and Send reminder to member. If you selected staff member or client, then email template field will be mandatory to select.

Checkout – It will change the status of document to check in.
Delete – File can be delete if it is not in use anywhere.

Also it will display all the details of file allow to edit file name, add favorites, permission, tags etc.

History – It will display all the actions with search option and display list as performed by user, Module Name, Date, IP Address and Description.

Add to favourite – It will add the document to favourite and also display in Main Documents folder. If you remove particular document from favourite, it will disappear from “Favourites” folder & on existing folder, it will show again with “Add to favourite” label.

Once you remove from favourite flag, it will show again with “Add to favourite” label.

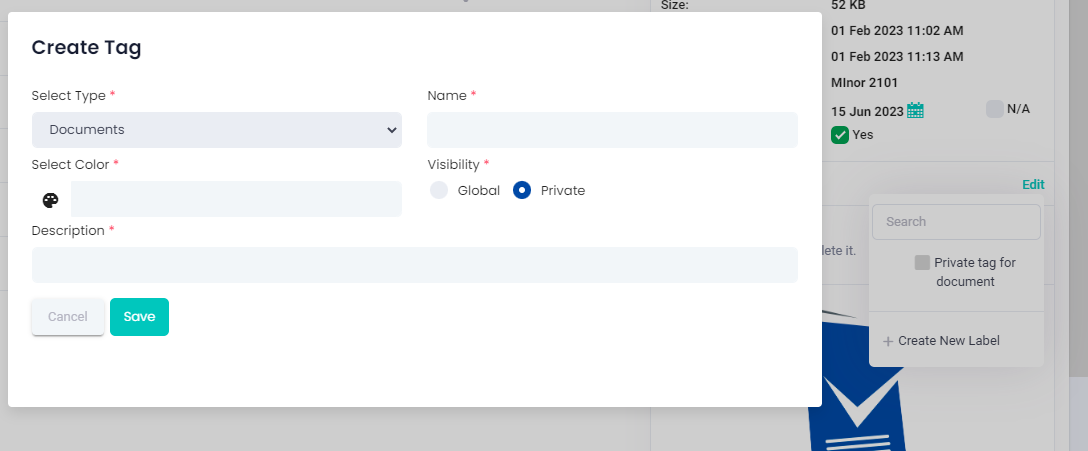
Tags: User can show the tags that have added from settings as well as add new tags from here.
You can add notes for the particular document from Add Note button selection. It will open popup to add note. Already added notes will be shown below “Note:” label.

What's Next

Back To Top